
1.4: Creating Screenshots
- Page ID
- 14280

One of the first steps to securing assistance with computer-related issues requires sharing the error or screen output with a teacher or technical support staff. Often, these support resources are not available to view the screen in-person. Therefore, capturing the screen output is a vital skill to help resolve computer issues. Screenshots, also known as screen captures, screen grabs, or print screens, are the technical terminology assigned to this piece of data. A screenshot is a digital image of what appears on a computer or television screen. Producing a screenshot can be a confusing task, which should be broken down into two parts. The first part is the capturing of the screen image, while the second part is the process of pasting the capture into a storable file. There are numerous methods of capturing a screenshot, and they vary from one computer device to another due to operating system versions and keyboard differences.
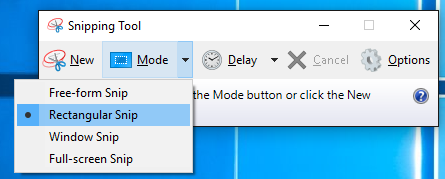
The most consistent method for Windows users to create screenshots is by utilizing the Windows Snipping Tool. As of late 2018, the new tool is called Snip & Sketch. Most images in this documentation have been generated with the help of these tools. To open the Snip & Sketch tool, select the Start button, type “snip” in the search box on the taskbar, and then select the
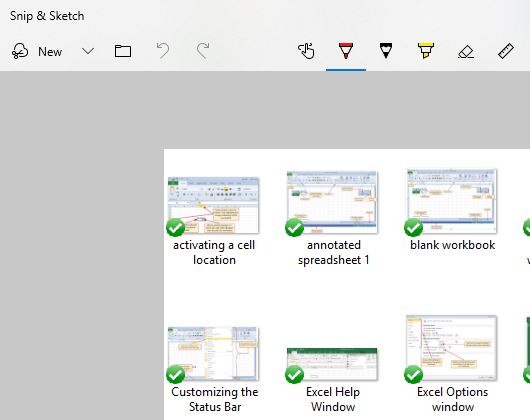
Snip & Sketch app from the list of results. In addition to capturing a full-screen snip, the Snip & Sketch Tool provides the convenience of capturing a more specific “snip” of data by using the mouse to draw a rectangular or free-form block of specific data to be captured. This allows for more focused data to be collected versus an entire screen of potentially competing images. Once the drawing is selected, the screenshot should automatically open in a new window. You can modify the screenshot by cropping, highlighting annotating or drawing on the image. This image can then be pasted into a new program (similar to how the above image was added to this document) or saved as a separate file to be stored on a permanent or cloud storage device. The Snip & Sketch tool also be set to a timer to take a screenshot in three or ten seconds. To take a screenshot with Snip & Sketch, just press PrtScn. Screenshots will be quite useful for providing feedback or asking questions to/from students/teachers, particularly in distance education environments.