
4.6: Formatting Worksheets
- Page ID
- 14311

Formatting data generally makes it easier to comprehend, and more attractive. The goal of formatting a business spreadsheet should be to make it look professional, accurate, and understandable. Options to format worksheet data depends a lot on the type of data. Formatting text in Excel is very similar to formatting text in Word. Using the Font and Alignment group icons on the Home tab of the ribbon, users can manually format all of the data in a cell or in a range of cells. Changing default formats includes things like changing the font color, style, size, text alignment in a cell, or apply formatting effects – all in an effort to make the data appear more visible.
Excel’s tabular layout (organized into labeled columns and numbered rows) sometimes limits the amount of data that can be efficiently displayed.
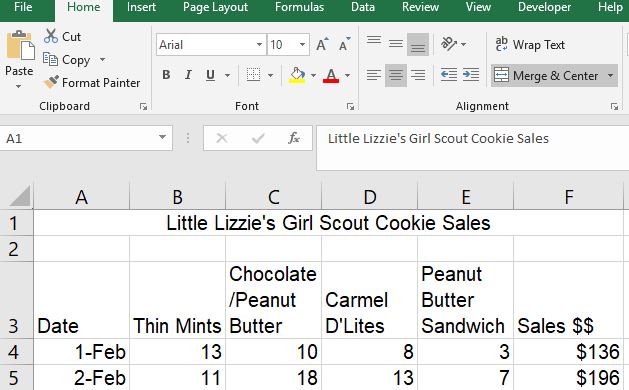
Using the Alignment group options can help format data to make it appear as much like a word processed report as possible. In the screenshot above, two Excel-unique formatting features help make the data more readable. In row 1, the text has been merged and centered across cells A1:F1. This required the cell range A1:F1 be selected before clicking the Merge & Center button from the Alignment group. This is very popular for worksheet titles. If the wrong cell range was selected and the Merge & Center is not effective, the user must re-select the Merge & Center button to unmerge the data, so the correct range can be selected before again clicking the Merge & Center button.
Another popular Excel text-formatting feature illustrated above is the Wrap Text tool, which will prevent text from being truncated by wrapping the text into multiple rows within the same cell. If a cell has a lot of text, the data will overlap into the next cell to the right of the active cell. However, if the adjacent cell already has data, the text will be truncated (cut-off) without applying this feature. Cells C3:E3 in the above screenshot each have the Wrap Text feature applied.
While Excel has some pretty useful text-formatting functionality, the majority of data entered into Excel is usually numerical data. Therefore, utilizing Excel’s number formats effectively is crucial to make the worksheet as professional as possible. Professional formatting relies a lot on consistent formatting. Therefore, using the Format Painter tool (introduced in the Word chapters) and workbook themes are very helpful to maintain that consistency. Changing the existing theme will dynamically update the appearance of all worksheets in a workbook by modifying the fonts, styles, colors and/or effects.
Applying the correct cell format to numerical data is more than just style – it is substance too, because applying the wrong format can impact how other, related cell results are interpreted. The following graphic describes some of the more popular number formats. In addition to the examples provided, there are also other formats, including date & time values, which can be accessed by clicking the Number Format drop-down list.
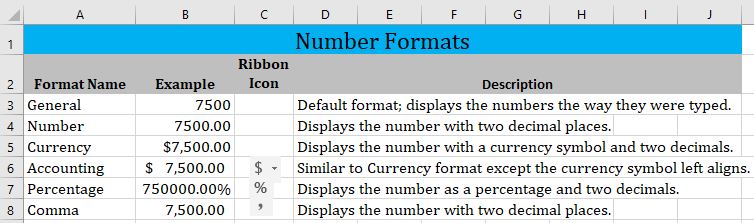
Changing the number of decimals displayed can be manipulated by the Increase Decimal and Decrease Decimal buttons in the Number group. The displayed value could change to a rounded value, however, the actual value stored in the cell has not changed unless a ROUND function has been applied. Formatting only affects how the value is displayed. Applying formats can result in number signs (#####) being displayed in a cell. This is not an error, but an indication that the cell width is not wide enough to display the formatted number.
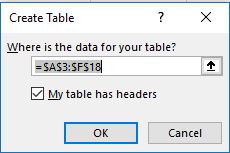
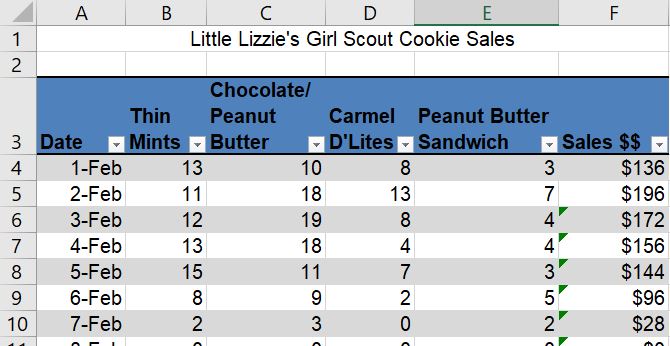
Excel data can also be formatted as a table. A table is a collection of related data, organized into a tabular layout of rows and columns, that can be manipulated via sorting, filtering and formulas. To create a table, select the data and click Insert > Table from the ribbon to open the Create Table dialog window.
Applying a table style will format the table with a predefined set of special table properties that includes options to define a header row or total row, and to band the row and/or columns to make the data easier to read. The filter buttons can also be removed. If the table functionality is no longer desired, click the Convert to Range option in the Tools group of the Design tab to convert the table to a normal range.

There are many additional formatting tools available within Excel, but it is important to consider that sometimes, less is more! Too much formatting can be overkill and reduce the readability of a worksheet. Try to limit the use of multiple colors, fonts, and background colors/graphics. Format with a design purpose, not to entertain, and don’t forget to use the Spell Check tool (F7) to proof your workbook before printing or sharing!