4.11: Adjusting the Page Layout and Preparing to Print
- Page ID
- 14316

The size of Excel workbooks tend to grow the more each worksheet is manipulated, typically by adding more columns and rows, and sometimes, more sheets. This added complexity makes physical output of Excel data somewhat challenging. Too many columns will result in the sheet not being able to be printed on one sheet of paper, and too many rows make make it difficult to interpret data on pages beyond the first page. Fortunately, the Page Layout tab can help fit the data on fewer sheets of paper and make each page easier to understand.

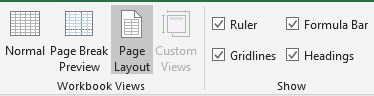
While themes can help modify the appearance of a spreadsheet’s colors and fonts, the other groups in the Page Layout tab can impact the arrangement of data, and streamline the readability of the output. Starting with the Page Setup group, Excel allows tremendous flexibility with the margins of each worksheet. For example, Narrow margins allow more data to fit on one page by reducing the amount of white space on the edges of the sheet. A quick and easy way to allow more columns to print on one sheet, is to change the orientation from the default Portrait, to Landscape, which allows more columns and fewer rows to print on one sheet. The effects of these Setup decisions can be more easily illustrated by switching from the default Normal workbook view to the Page Layout. The View tab also allows users to to enable/disable the Ruler, Formula Bar, and on-screen gridlines and headings.
If changing the margins and/or orientation is not resolving the issue of getting extra columns to print on the same page, an alternative could be changing the paper size. The default printer determines the paper sizes available from the Size drop-down list. To check the range of paper sizes that a printer can print on, consult the printer manual, or view the paper sizes that are currently set for the printer in the Print Setup dialog box. Some users have the option of printing to Legal (8.5″ x 14″) or even 11″ x 17″ (tabloid) printers, especially if commonly printing large worksheets.
A final, more drastic option to keep data from overlapping into multiple sheets, is to utilize the scaling feature. Using the Scale to Fit group from the Layout tab, a printed worksheet can be scaled by to modify the font size of printed output by either shrinking or enlarging the output. The options exist to scale the output to fit to 1 page wide (width) by 1 page tall (height). It might make sense to only modify the width, or by choosing a Scale percentage, which adjusts the overall sheet height and width proportionately. Keep in mind the needs of your audience. Too small of font might make the spreadsheet unreadable, and for certain audiences, the output might need to be scaled to a larger font than the editing view.
The Sheet Options group of the Layout tab provides two significant print features for basic Excel printing. These include the options to have gridlines and/or headings appear in printed output. By default, the options appear in the Viewing screen, but do not appear when printed. Without Headings, the output would be very difficult to explain to others, and gridlines, much like banded rows, make it easier for the eye to line up the intersections of rows and columns.
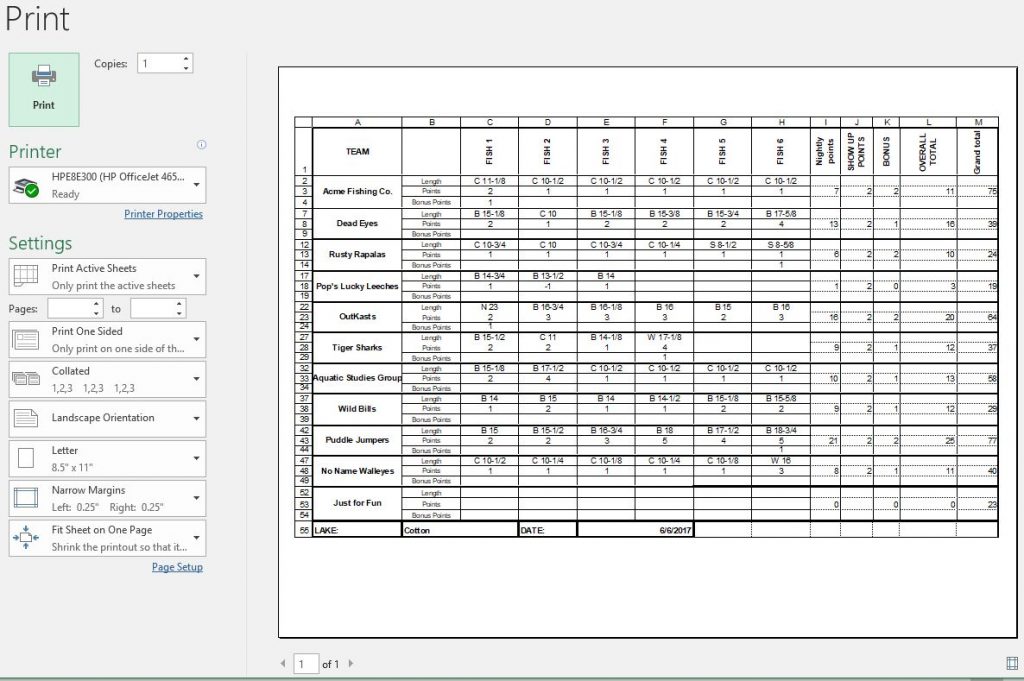
More advanced options exist for enhancing page layout and printing options by clicking the launcher button in each group. Additionally, several print settings can be adjusted in the Print Preview window. The sheet in the screenshot below is modified to print in landscape orientation with Narrow Margins and it is scaled to Fit on One Page. It also has headings included in the print output.
Practice 6: Test Scores, continued
- Open the Test Scores workbook previously saved.
- In the Table Tools Design tab, click the Convert to Range button remove the table functionality from the data. (Click Yes to the message)
- Type the labels: Total Points in cell A8 and Average in cell A9.
- In cell B8, click the AutoSum button to insert the SUM function. Accept the range that Excel proposes for the formula by clicking the Enter check mark on the formula bar. The formula should be: =SUM(B2:B7).
- With B8 as the active cell, use the fill handle to copy the formula to the destination cells C8:D8.
- In cell B9, enter a formula using the AVERAGE function without using the AutoSum functionality. Instead, use the Insert Function button to select the AVERAGE function, and enter the range B2:B7 as the arguments. NOTE: B8 should not be included in the range of argument cells. Use the fill handle to copy the formula to cells C9 and C10.
- In cell E2, double-click the fill handle. See what happens!
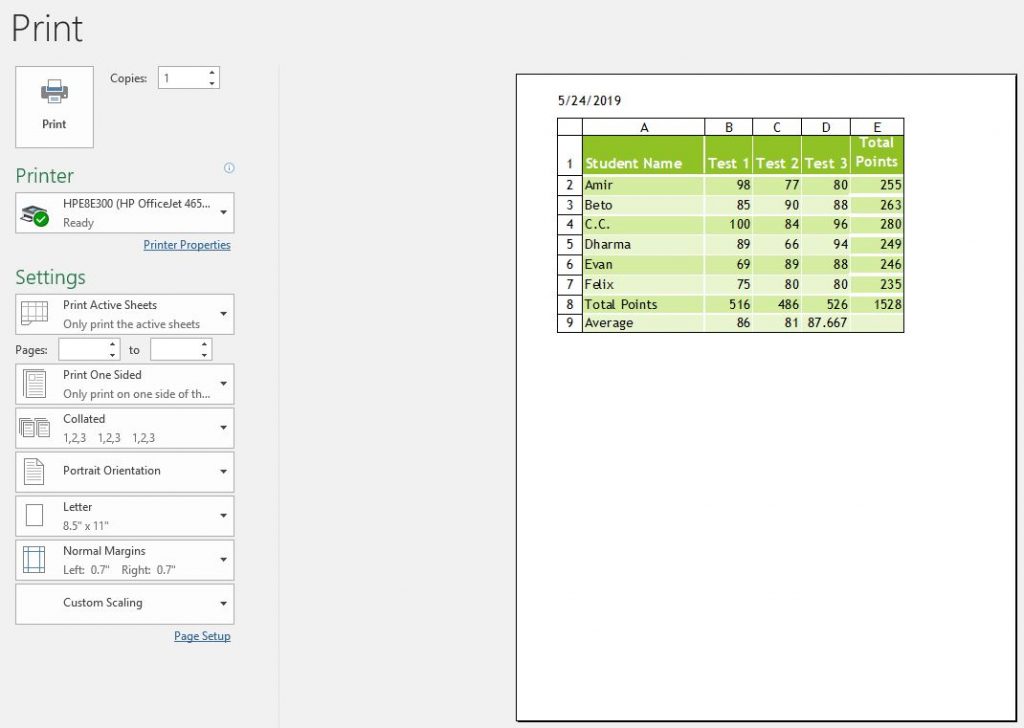
- Change the view to Page Layout.
- Add a header that includes the Current Date field from the Header & Footer Tools Design ribbon in the left side of the header.
- Ensure the Gridlines and Headings appear in printouts, scale the sheet to 150%, then view the file in Print Preview. Your worksheet should resemble the following:
- Save the file as TestScores2.xlsx.