
15.3: Alignment Group
- Page ID
- 13678

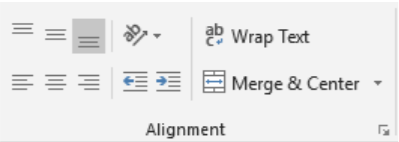
The alignment group allows the user to control how text is displayed in cells. The first group in the upper left-hand corner that has horizontal lines/controls the vertical alignment of text or numbers in a cell. The first icon on the left is Top Alignment, which connects the text to the top of the cell. The next icon is Middle Alignment, which centers the text vertically between the top and bottom of the cell. The last vertical alignment is Bottom Alignment, which places the text near the bottom of the cell. The bottom Alignment is the default vertical alignment.

The next alignment is Orientation  which allows the user to rotate the text vertically or diagonally. There is a drop-down box with more options to allow even more customization of how text is oriented in the cell to angle the text counterclockwise, clockwise, vertical, rotate text up and rotate text down. In addition, there are more options by clicking “Format Cell Alignment in the drop-down box in excel. In terms of text orientation, the cell is very flexible.
Next to Orientation on the right is Wrap Text  . The Wrap Text feature allows Excel to automatically adjust the vertical height of the cell to include all of the text in the cell by allowing the text to be placed on multiple lines. The default line format of excel is to display text on one line in a cell. If the cell is not long enough to accommodate the text, the text will be contained in the cell, but appear to be added to the next cell on the right. While each cell height and width can be adjusted with the mouse, the Wrap Text command allows for long text fields to be better displayed in the document.
The bottom row of the Alignment group begins with Horizontal Alignment settings  . The settings align the selected text to the left side of the cell (which is standard formatting), centered (which is common for titles), and right-aligned of the cell.
Next on the right, the increase/decrease indent icons  allow the user to move the cell closer or further away from the cell border depending on the horizontal alignment of the cell.
The last icon in the Alignment Group, Merge and Center  allows the user to allow information that is in one cell, to span multiple highlighted columns or rows and be treated as one cell. When two cells are merged together, the usual column or cell divider is removed, and the contents are displayed in both cells.
  . There are several options available to merge or unmerge cells in the drop-down dialog box to the right of Merge & Center with a downward arrow.
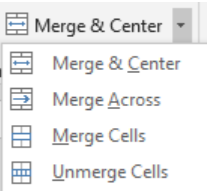
When selecting multiple cells. Merge & Center performs what was previously described: allowing highlighted cell information that spans more than the current cell length to occupy multiple columns as one cell and centers the information. Merge Across allows the user to take information that exists in multiple cells, and convert them into one cell that spans multiple columns. Merge Cell creates highlighted cells into one cell spanning multiple columns, and unmerge cells perform the opposite, it takes a merged cell that spans multiple columns and removes the cells that are merged into separate columns of cells. The information in the formerly merged cell is placed in the left cell.