4.10: Profile Creation
- Page ID
- 9528
\( \newcommand{\vecs}[1]{\overset { \scriptstyle \rightharpoonup} {\mathbf{#1}} } \)
\( \newcommand{\vecd}[1]{\overset{-\!-\!\rightharpoonup}{\vphantom{a}\smash {#1}}} \)
\( \newcommand{\id}{\mathrm{id}}\) \( \newcommand{\Span}{\mathrm{span}}\)
( \newcommand{\kernel}{\mathrm{null}\,}\) \( \newcommand{\range}{\mathrm{range}\,}\)
\( \newcommand{\RealPart}{\mathrm{Re}}\) \( \newcommand{\ImaginaryPart}{\mathrm{Im}}\)
\( \newcommand{\Argument}{\mathrm{Arg}}\) \( \newcommand{\norm}[1]{\| #1 \|}\)
\( \newcommand{\inner}[2]{\langle #1, #2 \rangle}\)
\( \newcommand{\Span}{\mathrm{span}}\)
\( \newcommand{\id}{\mathrm{id}}\)
\( \newcommand{\Span}{\mathrm{span}}\)
\( \newcommand{\kernel}{\mathrm{null}\,}\)
\( \newcommand{\range}{\mathrm{range}\,}\)
\( \newcommand{\RealPart}{\mathrm{Re}}\)
\( \newcommand{\ImaginaryPart}{\mathrm{Im}}\)
\( \newcommand{\Argument}{\mathrm{Arg}}\)
\( \newcommand{\norm}[1]{\| #1 \|}\)
\( \newcommand{\inner}[2]{\langle #1, #2 \rangle}\)
\( \newcommand{\Span}{\mathrm{span}}\) \( \newcommand{\AA}{\unicode[.8,0]{x212B}}\)
\( \newcommand{\vectorA}[1]{\vec{#1}} % arrow\)
\( \newcommand{\vectorAt}[1]{\vec{\text{#1}}} % arrow\)
\( \newcommand{\vectorB}[1]{\overset { \scriptstyle \rightharpoonup} {\mathbf{#1}} } \)
\( \newcommand{\vectorC}[1]{\textbf{#1}} \)
\( \newcommand{\vectorD}[1]{\overrightarrow{#1}} \)
\( \newcommand{\vectorDt}[1]{\overrightarrow{\text{#1}}} \)
\( \newcommand{\vectE}[1]{\overset{-\!-\!\rightharpoonup}{\vphantom{a}\smash{\mathbf {#1}}}} \)
\( \newcommand{\vecs}[1]{\overset { \scriptstyle \rightharpoonup} {\mathbf{#1}} } \)
\( \newcommand{\vecd}[1]{\overset{-\!-\!\rightharpoonup}{\vphantom{a}\smash {#1}}} \)
\(\newcommand{\avec}{\mathbf a}\) \(\newcommand{\bvec}{\mathbf b}\) \(\newcommand{\cvec}{\mathbf c}\) \(\newcommand{\dvec}{\mathbf d}\) \(\newcommand{\dtil}{\widetilde{\mathbf d}}\) \(\newcommand{\evec}{\mathbf e}\) \(\newcommand{\fvec}{\mathbf f}\) \(\newcommand{\nvec}{\mathbf n}\) \(\newcommand{\pvec}{\mathbf p}\) \(\newcommand{\qvec}{\mathbf q}\) \(\newcommand{\svec}{\mathbf s}\) \(\newcommand{\tvec}{\mathbf t}\) \(\newcommand{\uvec}{\mathbf u}\) \(\newcommand{\vvec}{\mathbf v}\) \(\newcommand{\wvec}{\mathbf w}\) \(\newcommand{\xvec}{\mathbf x}\) \(\newcommand{\yvec}{\mathbf y}\) \(\newcommand{\zvec}{\mathbf z}\) \(\newcommand{\rvec}{\mathbf r}\) \(\newcommand{\mvec}{\mathbf m}\) \(\newcommand{\zerovec}{\mathbf 0}\) \(\newcommand{\onevec}{\mathbf 1}\) \(\newcommand{\real}{\mathbb R}\) \(\newcommand{\twovec}[2]{\left[\begin{array}{r}#1 \\ #2 \end{array}\right]}\) \(\newcommand{\ctwovec}[2]{\left[\begin{array}{c}#1 \\ #2 \end{array}\right]}\) \(\newcommand{\threevec}[3]{\left[\begin{array}{r}#1 \\ #2 \\ #3 \end{array}\right]}\) \(\newcommand{\cthreevec}[3]{\left[\begin{array}{c}#1 \\ #2 \\ #3 \end{array}\right]}\) \(\newcommand{\fourvec}[4]{\left[\begin{array}{r}#1 \\ #2 \\ #3 \\ #4 \end{array}\right]}\) \(\newcommand{\cfourvec}[4]{\left[\begin{array}{c}#1 \\ #2 \\ #3 \\ #4 \end{array}\right]}\) \(\newcommand{\fivevec}[5]{\left[\begin{array}{r}#1 \\ #2 \\ #3 \\ #4 \\ #5 \\ \end{array}\right]}\) \(\newcommand{\cfivevec}[5]{\left[\begin{array}{c}#1 \\ #2 \\ #3 \\ #4 \\ #5 \\ \end{array}\right]}\) \(\newcommand{\mattwo}[4]{\left[\begin{array}{rr}#1 \amp #2 \\ #3 \amp #4 \\ \end{array}\right]}\) \(\newcommand{\laspan}[1]{\text{Span}\{#1\}}\) \(\newcommand{\bcal}{\cal B}\) \(\newcommand{\ccal}{\cal C}\) \(\newcommand{\scal}{\cal S}\) \(\newcommand{\wcal}{\cal W}\) \(\newcommand{\ecal}{\cal E}\) \(\newcommand{\coords}[2]{\left\{#1\right\}_{#2}}\) \(\newcommand{\gray}[1]{\color{gray}{#1}}\) \(\newcommand{\lgray}[1]{\color{lightgray}{#1}}\) \(\newcommand{\rank}{\operatorname{rank}}\) \(\newcommand{\row}{\text{Row}}\) \(\newcommand{\col}{\text{Col}}\) \(\renewcommand{\row}{\text{Row}}\) \(\newcommand{\nul}{\text{Nul}}\) \(\newcommand{\var}{\text{Var}}\) \(\newcommand{\corr}{\text{corr}}\) \(\newcommand{\len}[1]{\left|#1\right|}\) \(\newcommand{\bbar}{\overline{\bvec}}\) \(\newcommand{\bhat}{\widehat{\bvec}}\) \(\newcommand{\bperp}{\bvec^\perp}\) \(\newcommand{\xhat}{\widehat{\xvec}}\) \(\newcommand{\vhat}{\widehat{\vvec}}\) \(\newcommand{\uhat}{\widehat{\uvec}}\) \(\newcommand{\what}{\widehat{\wvec}}\) \(\newcommand{\Sighat}{\widehat{\Sigma}}\) \(\newcommand{\lt}{<}\) \(\newcommand{\gt}{>}\) \(\newcommand{\amp}{&}\) \(\definecolor{fillinmathshade}{gray}{0.9}\)
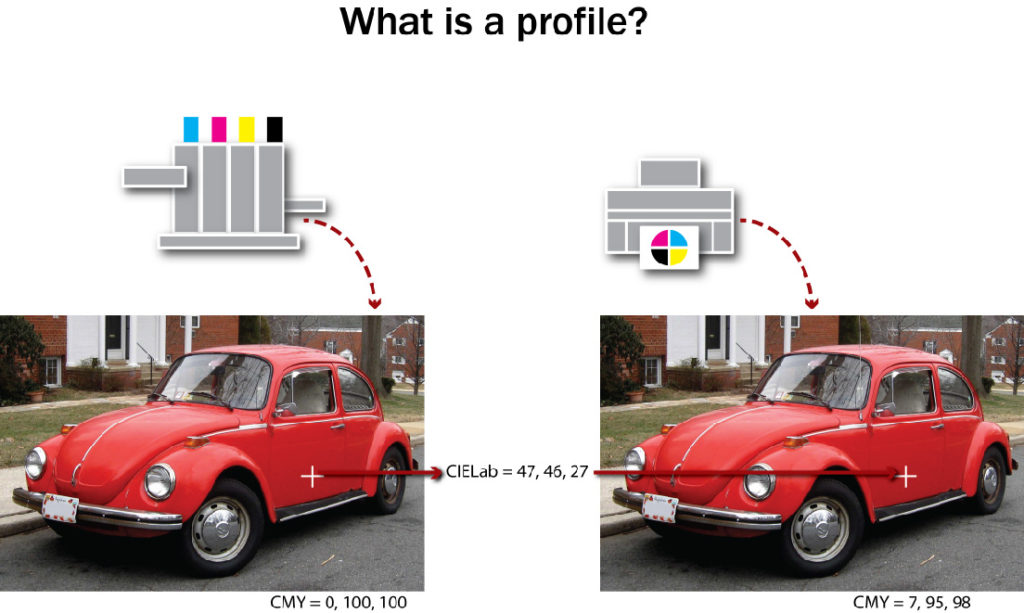
The measurement file contains the raw data of the relationship between the device dependent colour space of the device and the device independent colour space of the profile connection spaces (PCS). There are two additional parameters we have to provide along with this data in order for the colour management software to produce an output profile: total ink limit and black generation (see Figure 4.9).
Total Ink Limit
Total ink limit is a percentage, usually between 240% and 400%, that represents the upper threshold that the sum of the four process inks can total. Why would this change? Each device, in combination with its particular substrates (papers) and ink sets, has a different capability in terms of how much ink can be deposited. A coldset web newspaper press might be close to the lower end of 240%, while a high-end inkjet can support 100% from each of cyan, magenta, yellow, and black, and have a 400% rating. This total ink limit setting affects the colour distribution in darker colours. As the total ink limit decreases, dark colours require a higher proportion of black ink relative to CMY to stay within the ink limit percentage. With an ink limit of 360%, when black is at 90%, we still have room left for 90% of cyan, magenta, and yellow (4 x 90 = 360). But if the ink limit is 240%, with black at 90%, we can’t exceed 150% for the sum of the other three (150 + 90 = 240). Since cyan leads in a grey balance mix, we might have 60% cyan, 45% magenta, and 45% yellow (60 + 45 + 45 = 150). As the ink limit drops, black has to do more of the work of providing darkness for any heavy colour mix.
Black Generation
We also have to provide instruction on how the black component of the CMYK mix will be created. Remember that our subtractive primaries are CMY and that, theoretically, they provide all the colours in the visible spectrum. Where does K (black) come in? To bridge the gap between theory and real world performance, black ink does some very important things:
- It compensates for the spectral shortcomings of CMY inks: our inks are not perfect representations of what cyan, magenta, and yellow colours should be.
- It eliminates registration problems in black type: if there were no discreet black ink, every time we wanted to print black type we would have to stack cyan, magenta, and yellow on top of one another and make sure they fit perfectly.
- It helps us achieve easier neutrals: we can use black to replace the grey component of colours reducing the amount of CMY required to stay in balance on the press to provide consistent neutral tones.
- It provides cost savings: black ink is cheaper than coloured ink.
- It increases contrast: black’s greater density extends the tonal range of CMYK printing and improves the appearance of the final printed piece.
Since black is an add-on to our primary CMY colour set, we must provide instructions for its creation. Typically, we specify the black start point, maximum black, and black strength.
- Black start point: The point at which black enters colour mixes (range of 0% to 50%). If the black start point is 20%, then tones from white to 20% will carry CMY only.
- Maximum black: The upper allowable percentage of black ink used in the K separation (range 70% to 100%).
- Black strength: The relative quantity of black versus cyan, magenta, and yellow in the neutral grey component of colours (range 5 to 75%). As the number increases, colours can contain more black.
Black strength settings are also referred to as grey component replacement (GCR) values in colour separations. These may be set as percentages or simply as light, medium, and heavy, where more equals a larger proportion of black taking the place of CMY in neutral tones. GCR is the successor to UCR (under colour removal), which only moved exactly equivalent amounts of CMY to the black channel. UCR separations exhibit a ‘skeletal’ black, where there is a small amount of content in the black separation. With GCR, and as the black strength increases, more and more content moves into the black channel.
Final Processing
With the measurement file available, and total ink limit and black generation specified, processing can start in the colour management software and an output profile created. It will take from two to five minutes for all the calculations to complete. You may be prompted to specify whether to save the profile in the system or user location, or both. The system location will make the profile available to all users of the computer, while the user location will restrict it to the current user. Depending on your permissions at the computer, you may not be able to write into the system location. On an Apple OS X machine, the default location for the system is System/Library/ColorSync/Profiles and for the user, Users/(userID)/Library/ColorSync/Profiles.
Viewing Your Profile
The Mac provides a built-in tool for viewing a profile or comparing two profiles. From the Utilities folder, launch ColorSync. Select the second tab from the left and you’ll see a selection window on the left and a display pane on the right. The selection window contains a list of all ColorSync aware locations on your computer. Tip open the available folders and browse to find the profile you wish to view. Select a profile and a three-dimensional representation of its gamut in the Lab colour space appears on the right. Use your cursor to rotate the profile through all three of its axes. From the drop-down triangle in the display pane, choose Hold for comparison. The current profile is ghosted back, and you can select a second profile to display at full strength on top of it so you can compare the relative gamuts of the two profiles.
Profile Limitations
Remember that your profile represents the behaviour of the device for particular imaging parameters such as a specific substrate, resolution (screen ruling), and ink set. If any of those parameters are significantly altered, it requires a new profile to accurately represent the colour results. For real-world applications, profiles representing related groups of parameters are employed. One profile might represent all uncoated stock at 100 to 133 lines per inch, a second for coated stock at 150 to 175 lines per inch, and a third for a high saturation ink set on glossy stock with high resolution stochastic screening.
Media Attributions
- what is a profile by IFCAR adapted by Ken Jeffrey


