1.6: Fillet Weld Symbols
- Page ID
- 5152
\( \newcommand{\vecs}[1]{\overset { \scriptstyle \rightharpoonup} {\mathbf{#1}} } \)
\( \newcommand{\vecd}[1]{\overset{-\!-\!\rightharpoonup}{\vphantom{a}\smash {#1}}} \)
\( \newcommand{\id}{\mathrm{id}}\) \( \newcommand{\Span}{\mathrm{span}}\)
( \newcommand{\kernel}{\mathrm{null}\,}\) \( \newcommand{\range}{\mathrm{range}\,}\)
\( \newcommand{\RealPart}{\mathrm{Re}}\) \( \newcommand{\ImaginaryPart}{\mathrm{Im}}\)
\( \newcommand{\Argument}{\mathrm{Arg}}\) \( \newcommand{\norm}[1]{\| #1 \|}\)
\( \newcommand{\inner}[2]{\langle #1, #2 \rangle}\)
\( \newcommand{\Span}{\mathrm{span}}\)
\( \newcommand{\id}{\mathrm{id}}\)
\( \newcommand{\Span}{\mathrm{span}}\)
\( \newcommand{\kernel}{\mathrm{null}\,}\)
\( \newcommand{\range}{\mathrm{range}\,}\)
\( \newcommand{\RealPart}{\mathrm{Re}}\)
\( \newcommand{\ImaginaryPart}{\mathrm{Im}}\)
\( \newcommand{\Argument}{\mathrm{Arg}}\)
\( \newcommand{\norm}[1]{\| #1 \|}\)
\( \newcommand{\inner}[2]{\langle #1, #2 \rangle}\)
\( \newcommand{\Span}{\mathrm{span}}\) \( \newcommand{\AA}{\unicode[.8,0]{x212B}}\)
\( \newcommand{\vectorA}[1]{\vec{#1}} % arrow\)
\( \newcommand{\vectorAt}[1]{\vec{\text{#1}}} % arrow\)
\( \newcommand{\vectorB}[1]{\overset { \scriptstyle \rightharpoonup} {\mathbf{#1}} } \)
\( \newcommand{\vectorC}[1]{\textbf{#1}} \)
\( \newcommand{\vectorD}[1]{\overrightarrow{#1}} \)
\( \newcommand{\vectorDt}[1]{\overrightarrow{\text{#1}}} \)
\( \newcommand{\vectE}[1]{\overset{-\!-\!\rightharpoonup}{\vphantom{a}\smash{\mathbf {#1}}}} \)
\( \newcommand{\vecs}[1]{\overset { \scriptstyle \rightharpoonup} {\mathbf{#1}} } \)
\( \newcommand{\vecd}[1]{\overset{-\!-\!\rightharpoonup}{\vphantom{a}\smash {#1}}} \)
\(\newcommand{\avec}{\mathbf a}\) \(\newcommand{\bvec}{\mathbf b}\) \(\newcommand{\cvec}{\mathbf c}\) \(\newcommand{\dvec}{\mathbf d}\) \(\newcommand{\dtil}{\widetilde{\mathbf d}}\) \(\newcommand{\evec}{\mathbf e}\) \(\newcommand{\fvec}{\mathbf f}\) \(\newcommand{\nvec}{\mathbf n}\) \(\newcommand{\pvec}{\mathbf p}\) \(\newcommand{\qvec}{\mathbf q}\) \(\newcommand{\svec}{\mathbf s}\) \(\newcommand{\tvec}{\mathbf t}\) \(\newcommand{\uvec}{\mathbf u}\) \(\newcommand{\vvec}{\mathbf v}\) \(\newcommand{\wvec}{\mathbf w}\) \(\newcommand{\xvec}{\mathbf x}\) \(\newcommand{\yvec}{\mathbf y}\) \(\newcommand{\zvec}{\mathbf z}\) \(\newcommand{\rvec}{\mathbf r}\) \(\newcommand{\mvec}{\mathbf m}\) \(\newcommand{\zerovec}{\mathbf 0}\) \(\newcommand{\onevec}{\mathbf 1}\) \(\newcommand{\real}{\mathbb R}\) \(\newcommand{\twovec}[2]{\left[\begin{array}{r}#1 \\ #2 \end{array}\right]}\) \(\newcommand{\ctwovec}[2]{\left[\begin{array}{c}#1 \\ #2 \end{array}\right]}\) \(\newcommand{\threevec}[3]{\left[\begin{array}{r}#1 \\ #2 \\ #3 \end{array}\right]}\) \(\newcommand{\cthreevec}[3]{\left[\begin{array}{c}#1 \\ #2 \\ #3 \end{array}\right]}\) \(\newcommand{\fourvec}[4]{\left[\begin{array}{r}#1 \\ #2 \\ #3 \\ #4 \end{array}\right]}\) \(\newcommand{\cfourvec}[4]{\left[\begin{array}{c}#1 \\ #2 \\ #3 \\ #4 \end{array}\right]}\) \(\newcommand{\fivevec}[5]{\left[\begin{array}{r}#1 \\ #2 \\ #3 \\ #4 \\ #5 \\ \end{array}\right]}\) \(\newcommand{\cfivevec}[5]{\left[\begin{array}{c}#1 \\ #2 \\ #3 \\ #4 \\ #5 \\ \end{array}\right]}\) \(\newcommand{\mattwo}[4]{\left[\begin{array}{rr}#1 \amp #2 \\ #3 \amp #4 \\ \end{array}\right]}\) \(\newcommand{\laspan}[1]{\text{Span}\{#1\}}\) \(\newcommand{\bcal}{\cal B}\) \(\newcommand{\ccal}{\cal C}\) \(\newcommand{\scal}{\cal S}\) \(\newcommand{\wcal}{\cal W}\) \(\newcommand{\ecal}{\cal E}\) \(\newcommand{\coords}[2]{\left\{#1\right\}_{#2}}\) \(\newcommand{\gray}[1]{\color{gray}{#1}}\) \(\newcommand{\lgray}[1]{\color{lightgray}{#1}}\) \(\newcommand{\rank}{\operatorname{rank}}\) \(\newcommand{\row}{\text{Row}}\) \(\newcommand{\col}{\text{Col}}\) \(\renewcommand{\row}{\text{Row}}\) \(\newcommand{\nul}{\text{Nul}}\) \(\newcommand{\var}{\text{Var}}\) \(\newcommand{\corr}{\text{corr}}\) \(\newcommand{\len}[1]{\left|#1\right|}\) \(\newcommand{\bbar}{\overline{\bvec}}\) \(\newcommand{\bhat}{\widehat{\bvec}}\) \(\newcommand{\bperp}{\bvec^\perp}\) \(\newcommand{\xhat}{\widehat{\xvec}}\) \(\newcommand{\vhat}{\widehat{\vvec}}\) \(\newcommand{\uhat}{\widehat{\uvec}}\) \(\newcommand{\what}{\widehat{\wvec}}\) \(\newcommand{\Sighat}{\widehat{\Sigma}}\) \(\newcommand{\lt}{<}\) \(\newcommand{\gt}{>}\) \(\newcommand{\amp}{&}\) \(\definecolor{fillinmathshade}{gray}{0.9}\)Fillet welds are one of the most common weld types in the industry. This weld is used when the joint has two members coming together to form an intersection of commonly 90 degrees. These welds can be applied on varying angles but this would be the most prominent.
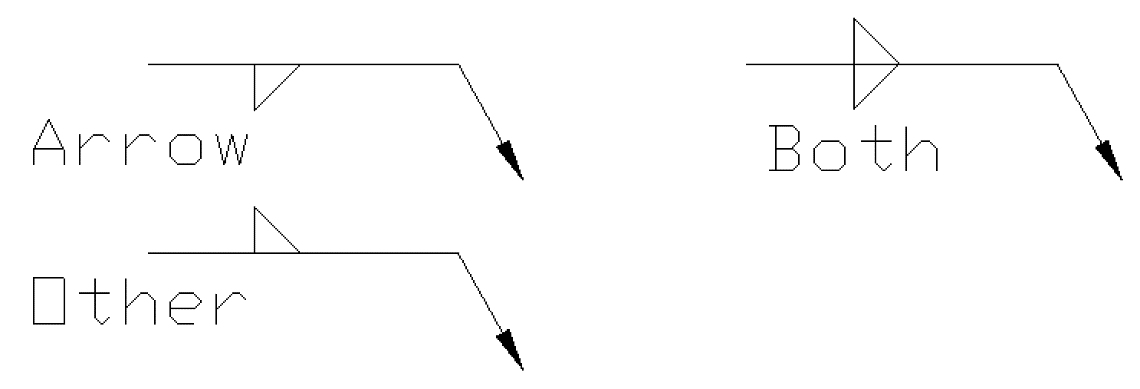
A fillet weld symbol can be used with an arrow side (below reference line) other side (above reference line) significance or on both sides (both sides of the reference line.) When a fillet weld is required on both sides of the reference line it is called a double fillet weld. The vertical leg of the symbol will always be placed to the left regardless of which way the arrow is pointing.
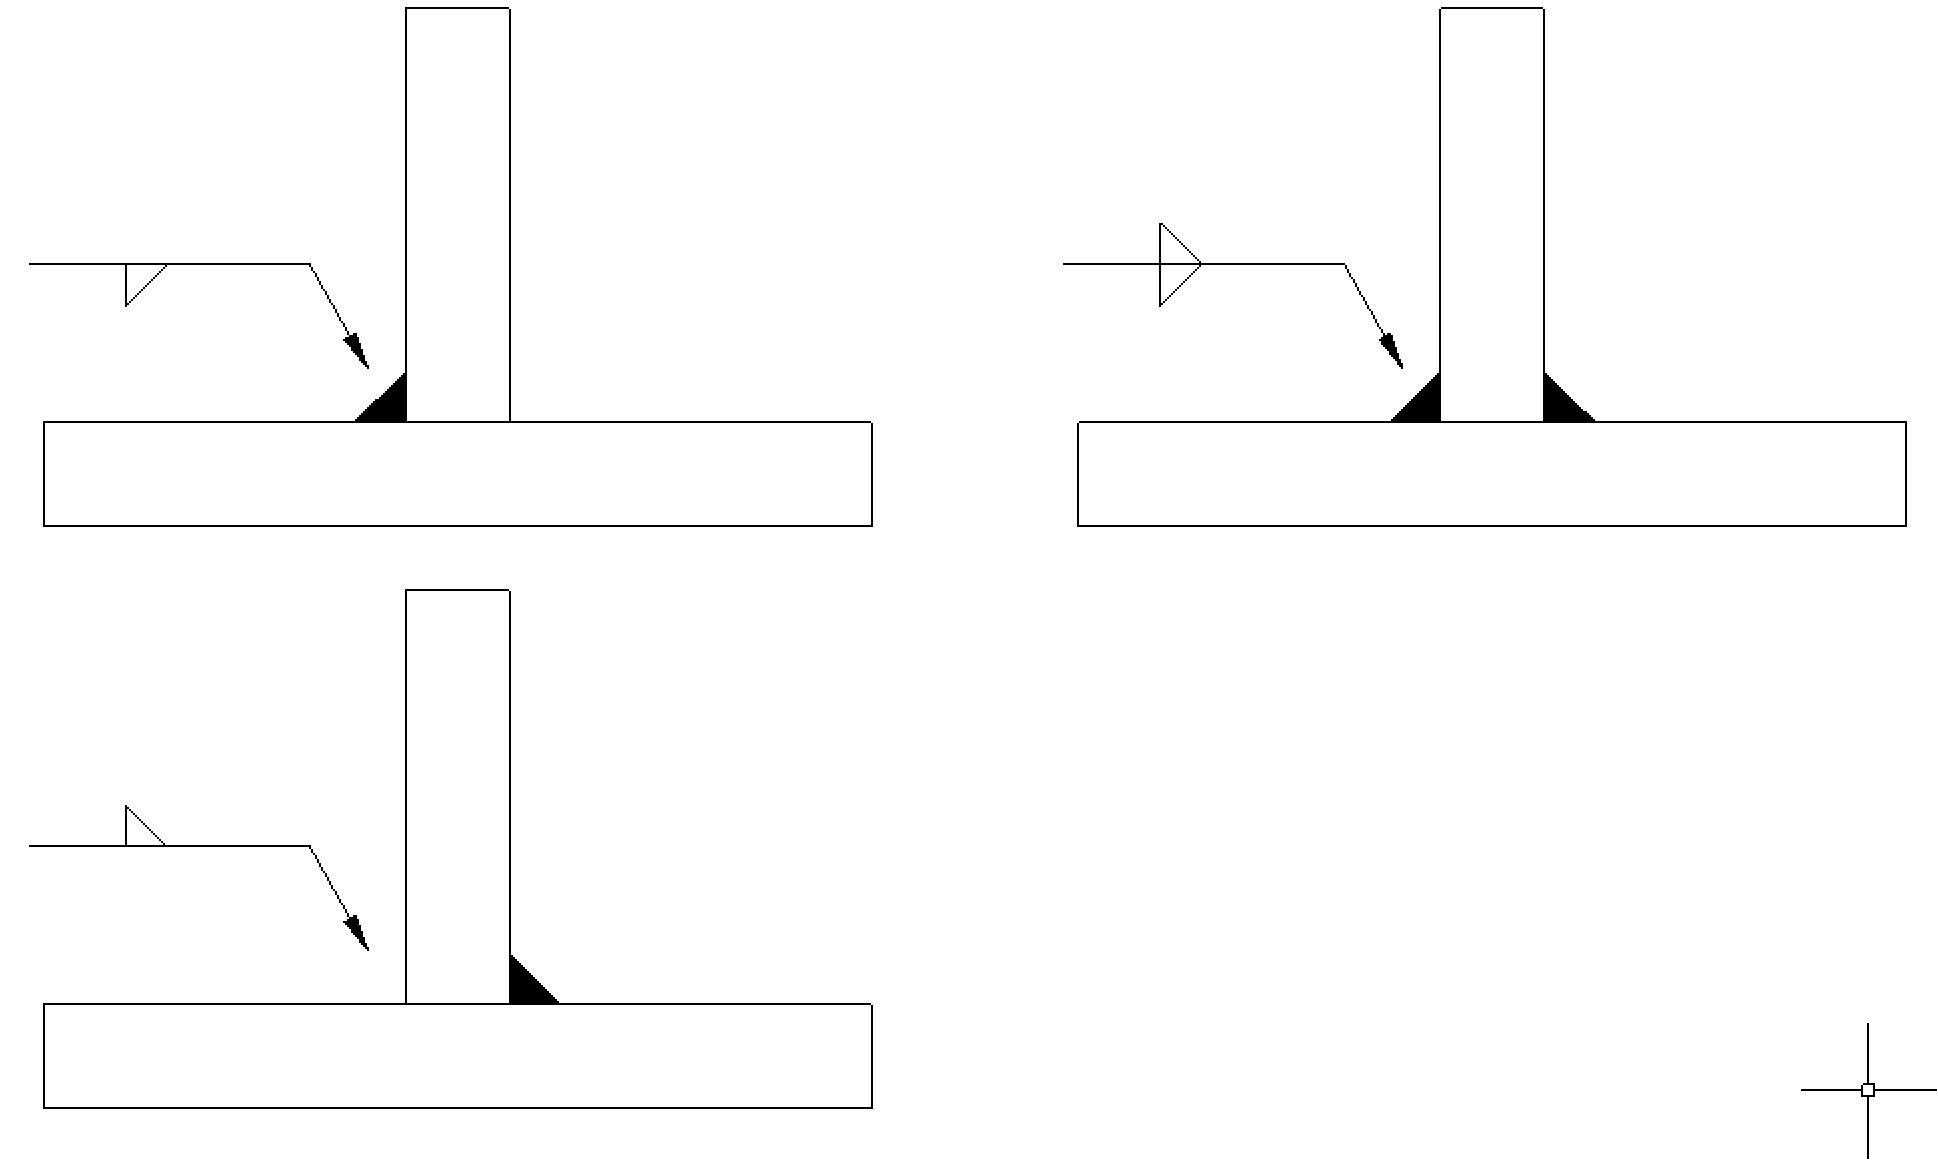
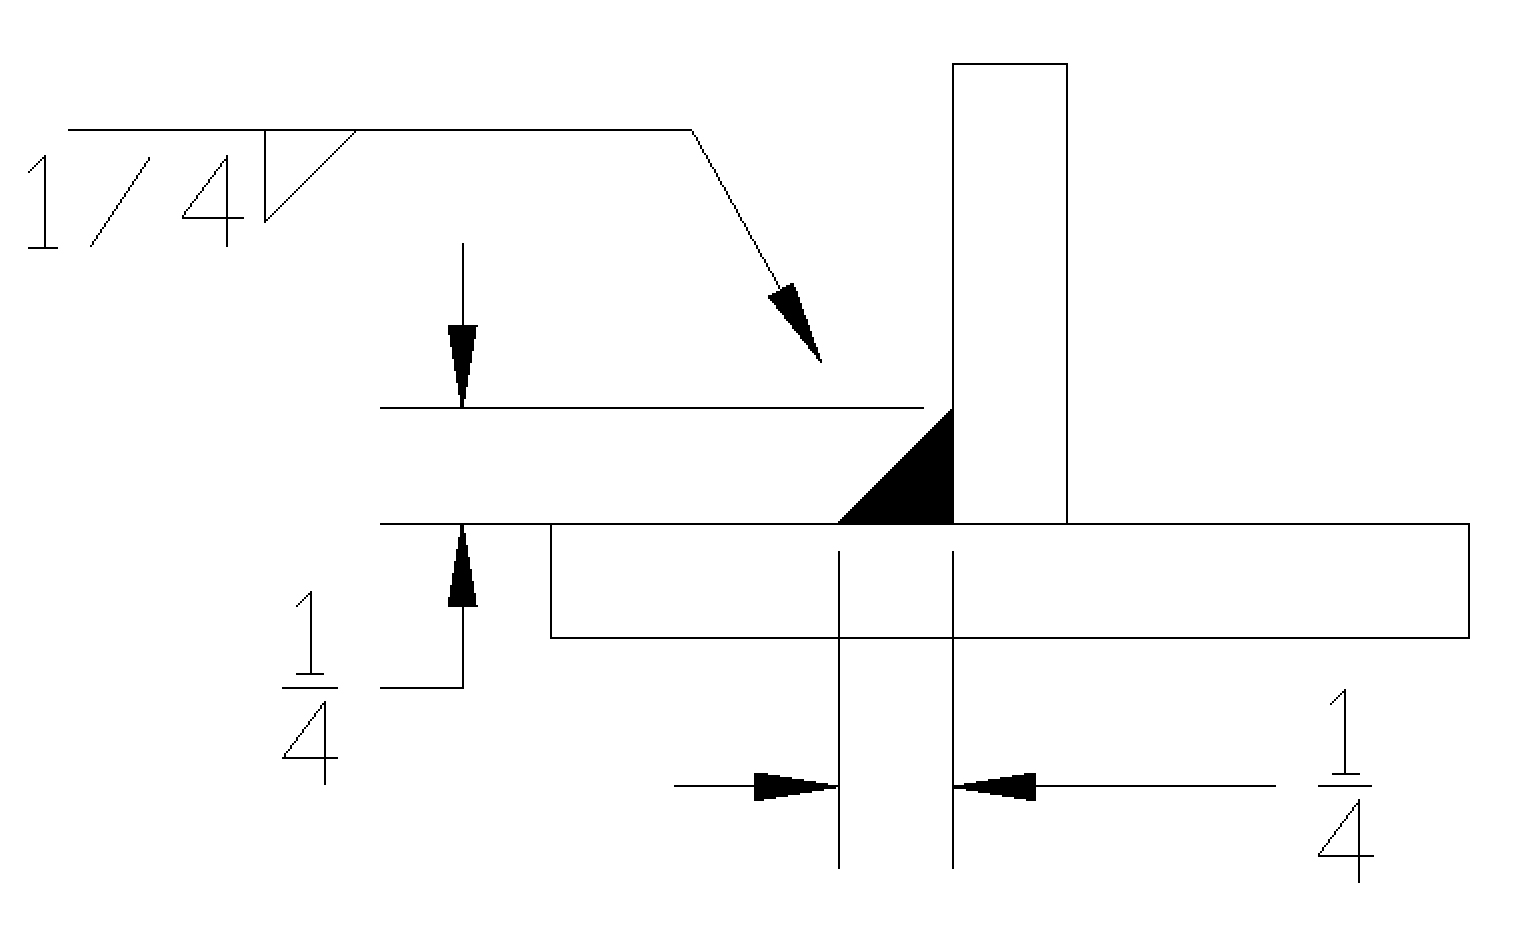
Fillet welds may have a size associated with them. This size is called out on the left side of the symbol before the vertical side. The size is indicating the leg length of the weld. If a single size is called out this is specifying that weld should have equal leg sizes. If it is an equal leg fillet weld it is not common to dimension it on the print as shown below for demonstration purpose.
If a double fillet weld is called out the size will be shown for both sides of the joint, depending on the part these welds could vary in size so it is necessary to provide this information.
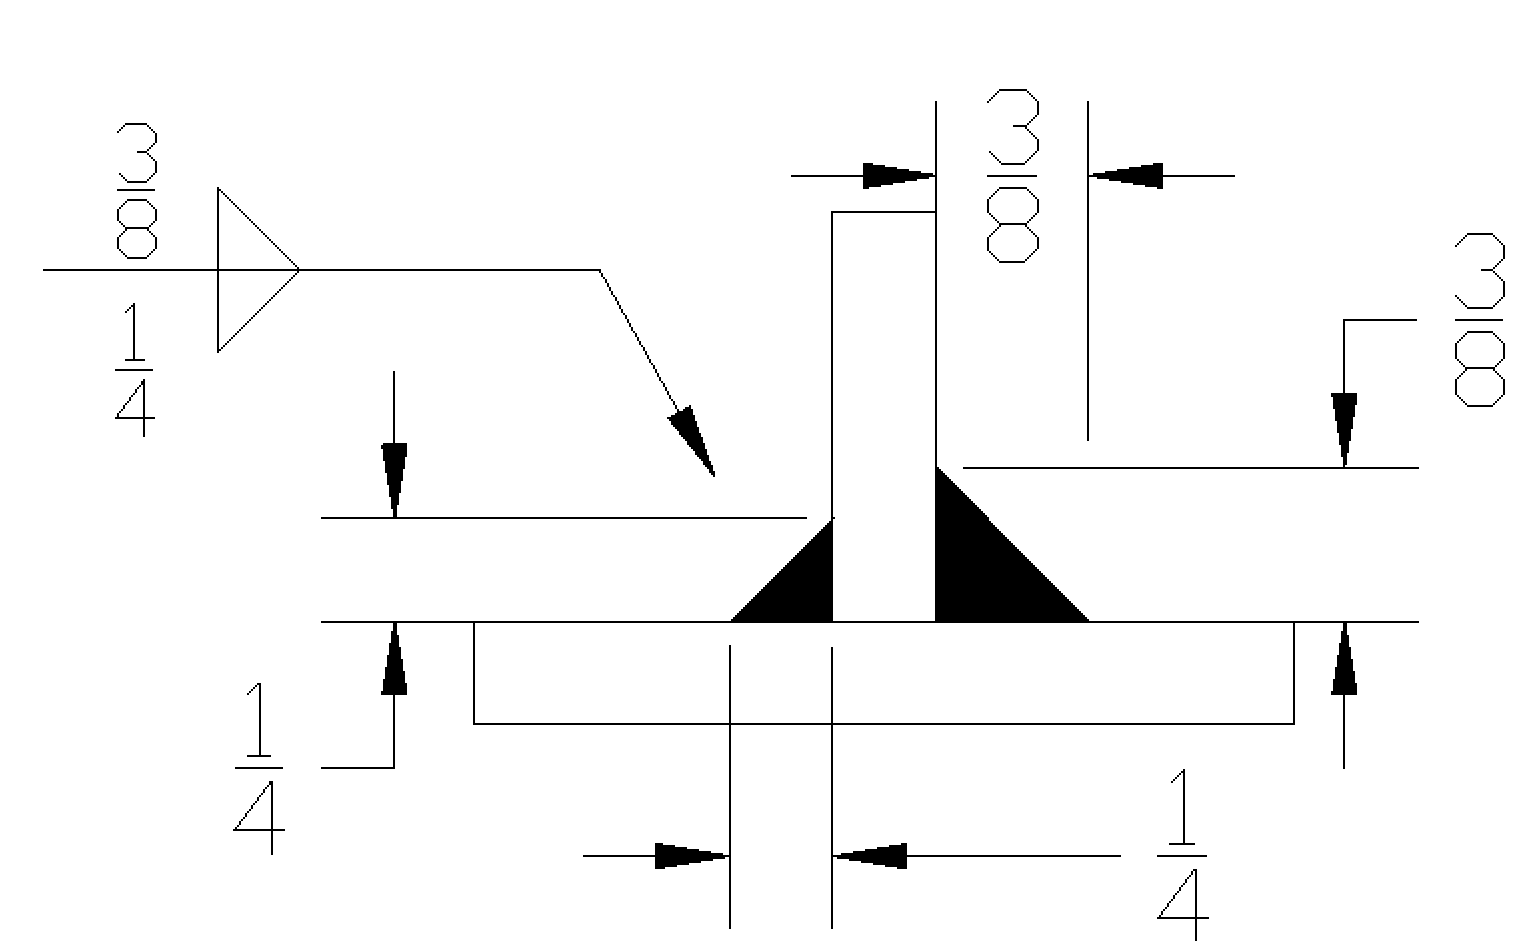
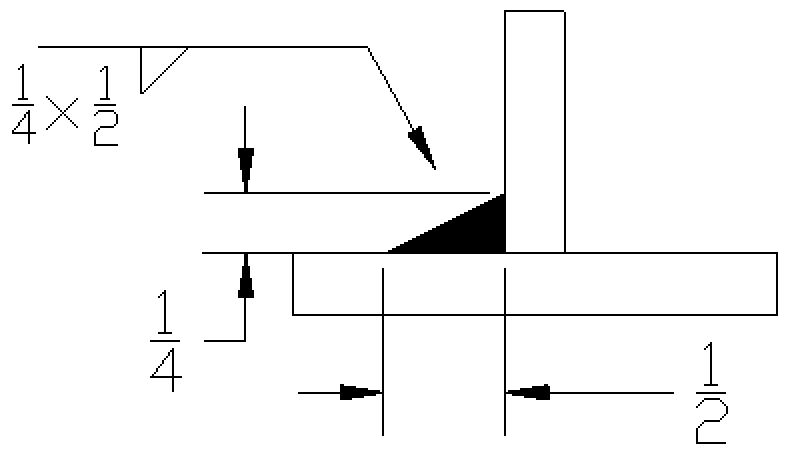
There are times when an unequal leg fillet weld is called out. In this situation the part must be dimensioned in order to apply the correct leg size to the right member being welded. This may include only one of the two leg lengths. If there were no indication of which leg is which the part could be welded incorrectly.
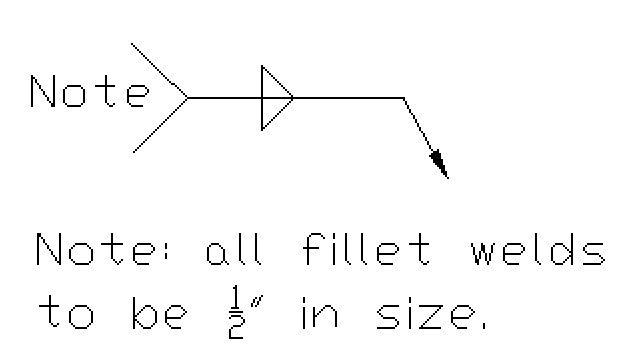
Sometimes fillet welds will not be shown with a size but will rather have a note in the tail of the symbol that gives required information for size. This is common when fillet welds will all be the same size.
In the case of the length of a weld, this may or may not have a dimension associated with it. If the weld does not have a dimension the weld will be the continuous length of the joint. Whether the part is 2” or 60” long if it has no dimension the weld will run the length of the joint. A weld may be applied only to a specific length of a joint. This must be shown in the weld symbol to communicate the information between individuals. The weld length will be provided on the right side of the fillet weld symbol.
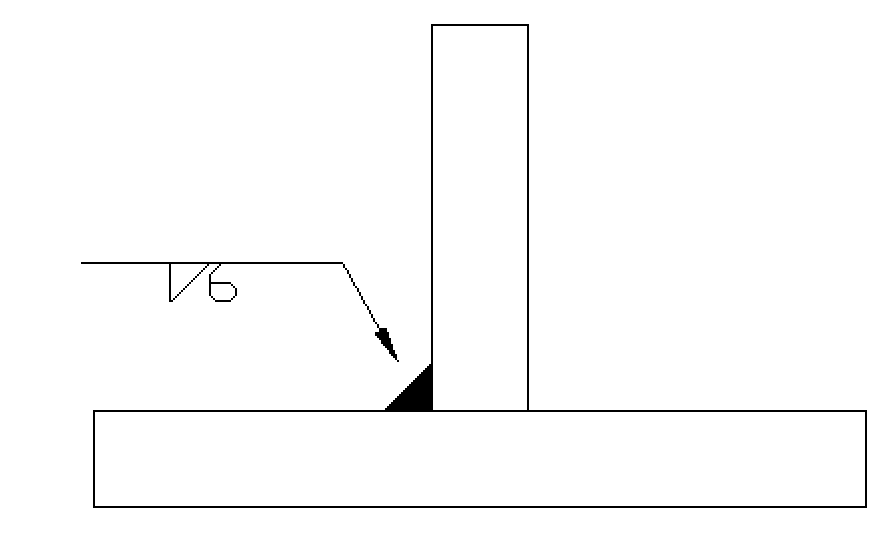
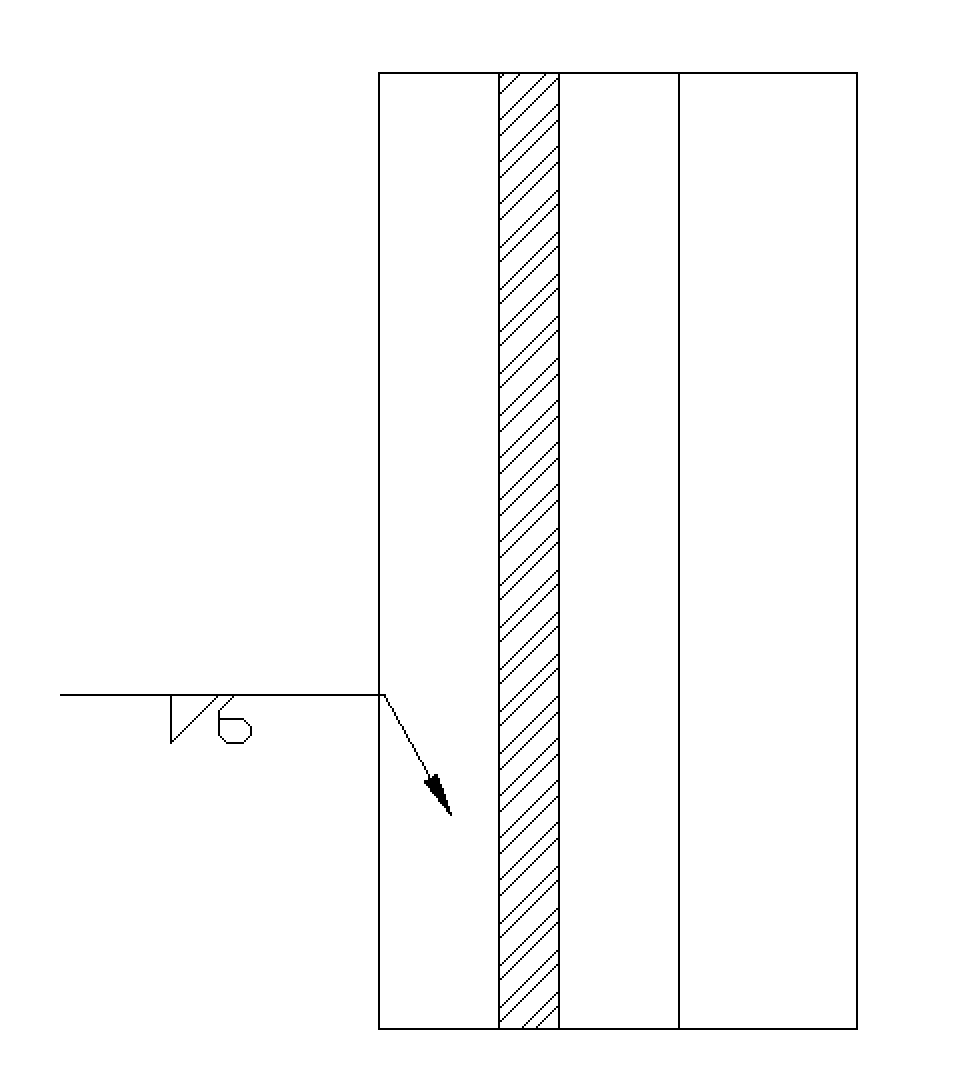
This shows a 6” fillet weld to be applied to the arrow side.
There may be times where a length is given on a part and the location of the weld will be given with a dimension in order to achieve the correct location.
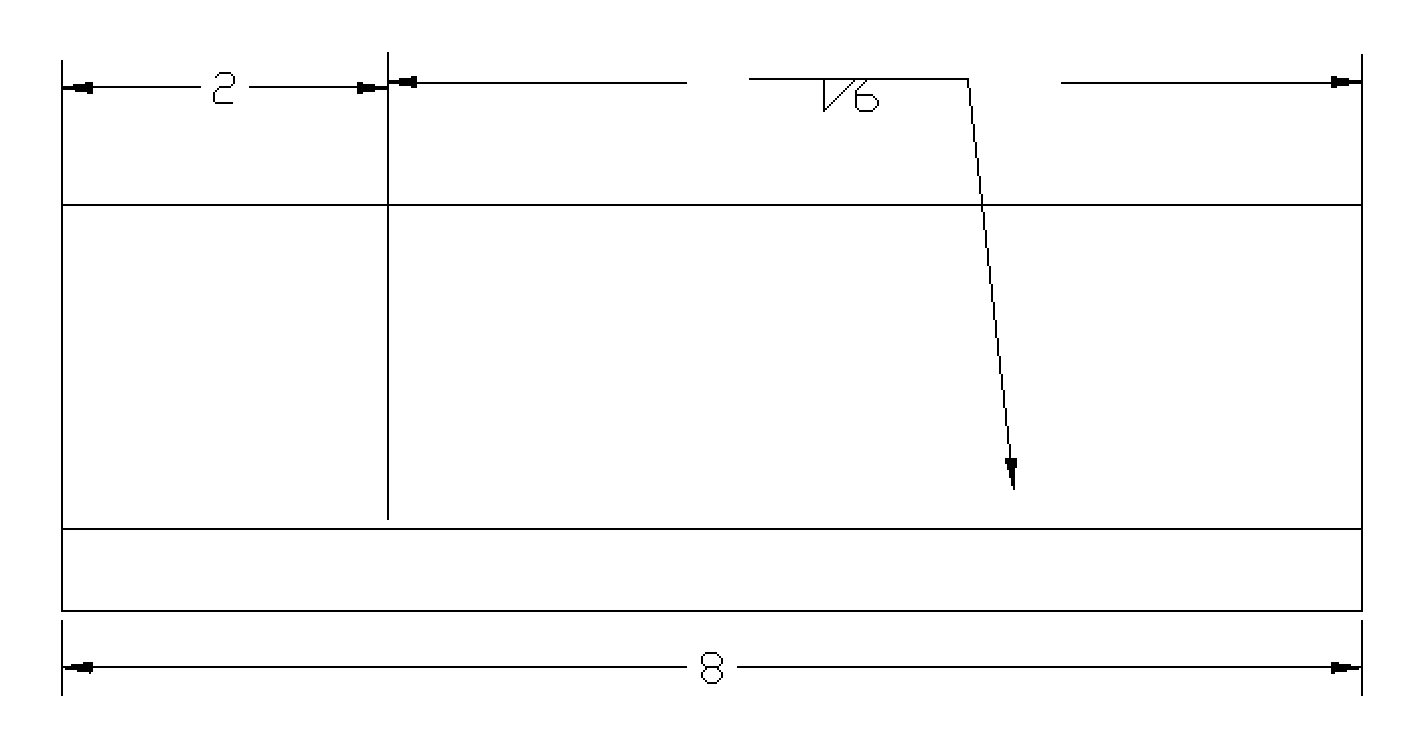
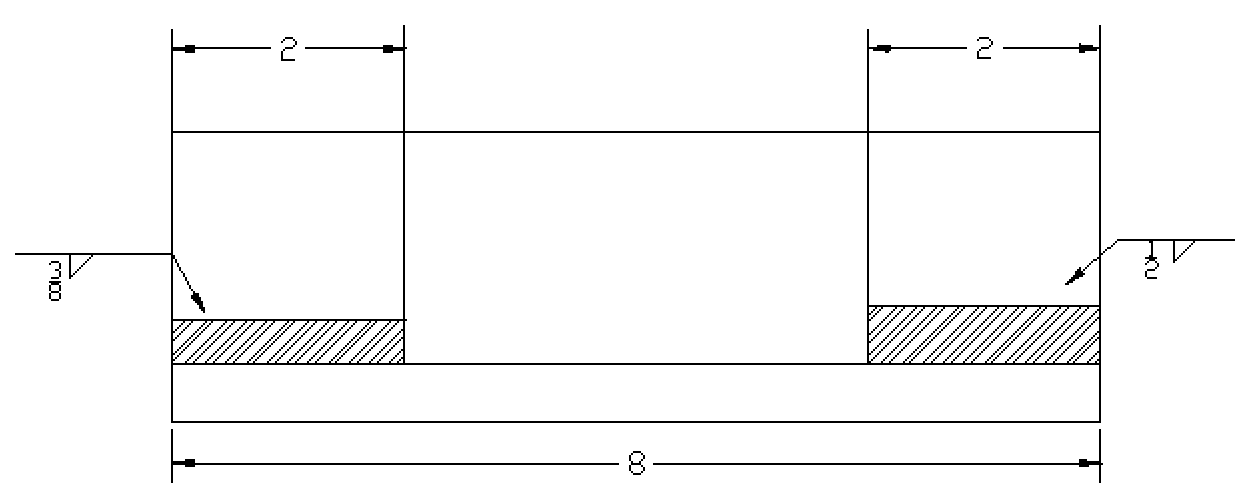
Hatching lines may be used to indicate the length of a weld instead of using a dimension on the weld symbol itself.
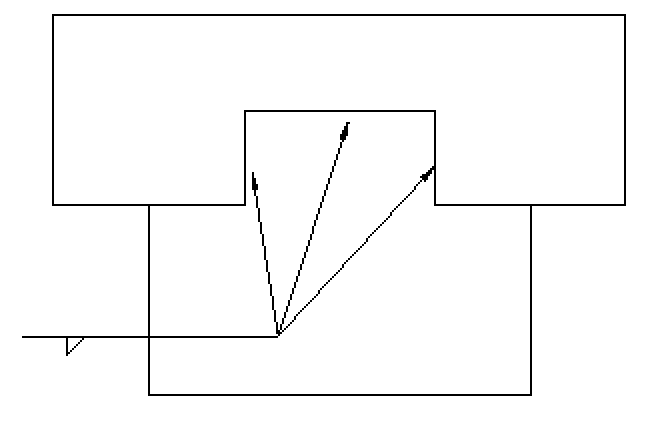
There are instances when a weld may change direction because of part geometry. If this happens it will be called out using multiple arrows off of one reference line.
When a weld is not required to be continuous it is common to apply an intermittent weld. This means that there are gaps between the termination of one weld and the start of the next. These are called weld segments. They are commonly referred to as skip welds in the industry.
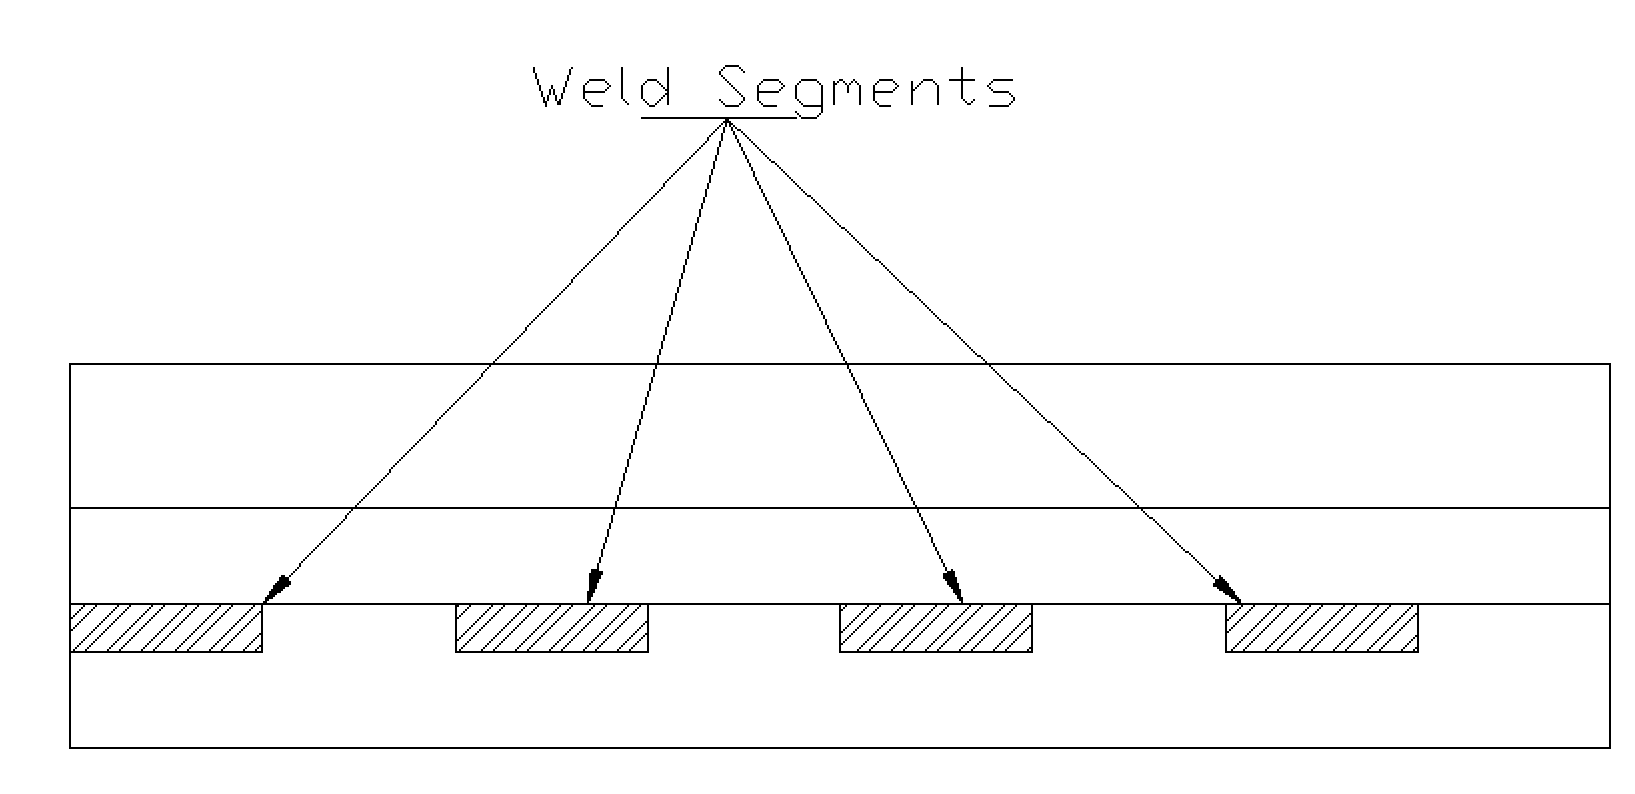
When using an intermittent weld there is a call out specified for the length of the weld and also the pitch that is to be applied. When this is shown on the right side of the symbol and it is called as the length of segment a hyphen and then the pitch of the welds. The pitch of the weld is measured as center to center of the next segment. (Ex. 1-2)
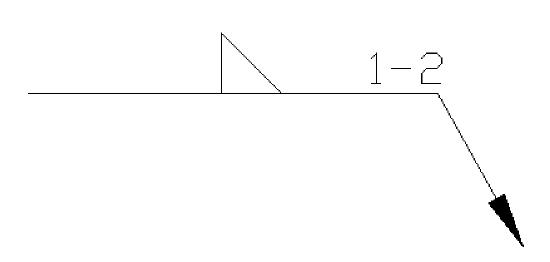
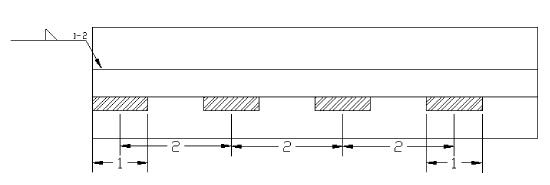
At times that there are welds on both sides of the joint and they are intermittent, this now becomes chain intermittent welding. This can be seen on long sections of a tee joint that isn’t under a large amount of stress.
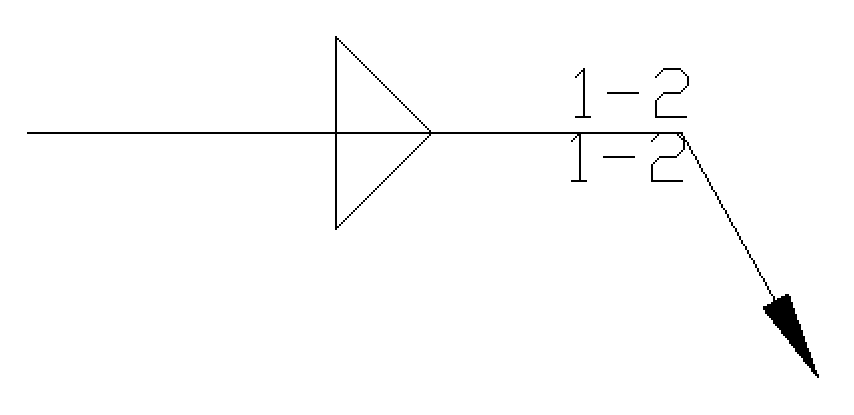

When an intermittent fillet is not a chain weld it will then be called out as a staggered intermittent fillet weld. The welds will be placed on both sides of the joint but it will be offset with one another. This offset shows on the reference line as well. It could be staggered in either direction on the reference line. Dimensions of these welds must be specified on both sides of the reference line.
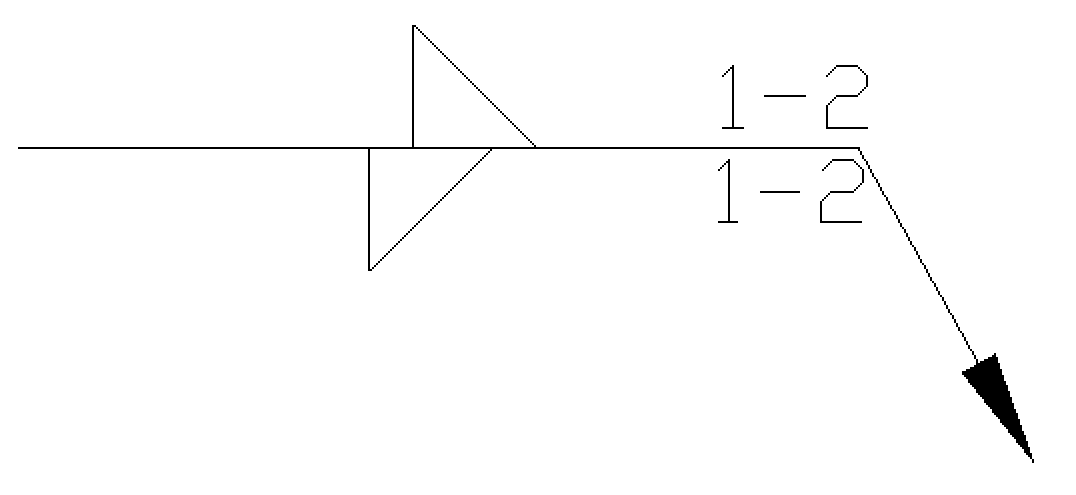

If the weld is only to be intermittent on one side and a continuous weld on the other the symbol must be dimensioned individually.
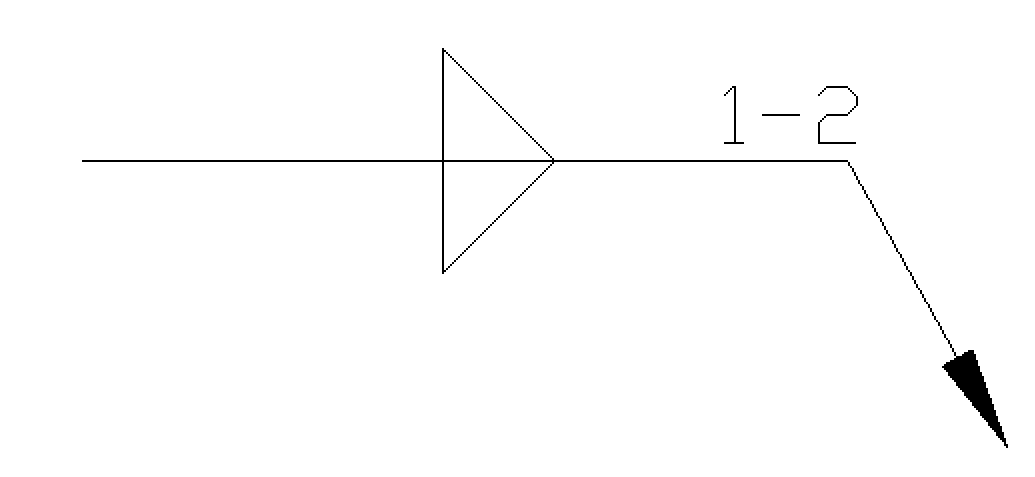

Not all pitch will be the same, or necessarily common space. You must be able to calculate the spacing between weld stops and weld starts in order to apply the correct welds to the specification. An easy way to find this distance is simply subtract the pitch from the weld length (segment.)
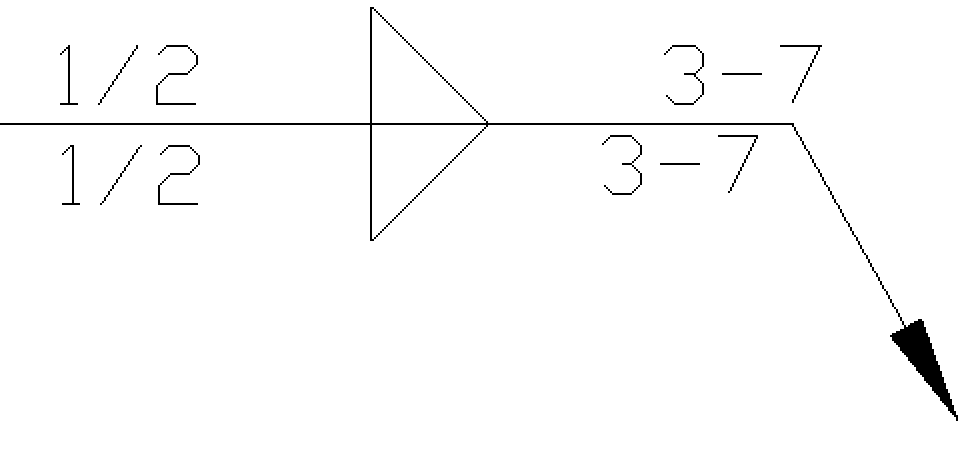
7 inches (pitch) – 3 inches (length of segment) = 4 inches (spacing in between welds)
At times there will be a mixture of continuous welding as well as intermittent welding. If this occurs the spacing between these segments will all be the same.

If this combination occurs welding symbols should specify continuous and intermittent on the same side of the joint. These are also often dimensioned.

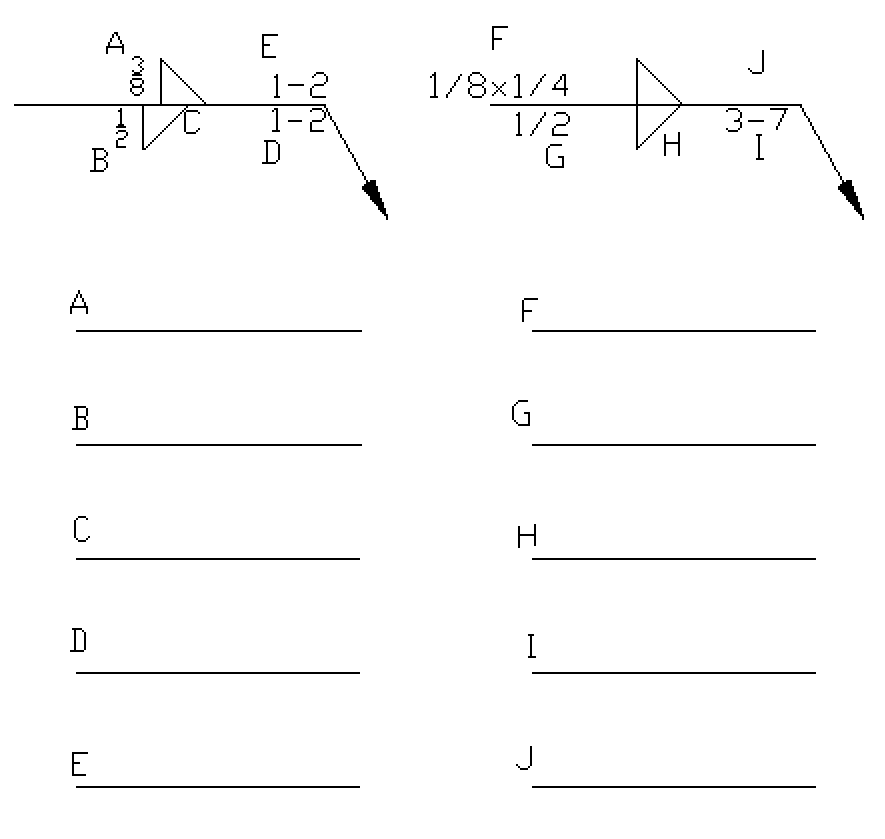
Fillet Weld Quiz
Write down the corresponding information with each letter and specify what it is.
