4.1: Piping and Fittings
- Page ID
- 2318
\( \newcommand{\vecs}[1]{\overset { \scriptstyle \rightharpoonup} {\mathbf{#1}} } \)
\( \newcommand{\vecd}[1]{\overset{-\!-\!\rightharpoonup}{\vphantom{a}\smash {#1}}} \)
\( \newcommand{\id}{\mathrm{id}}\) \( \newcommand{\Span}{\mathrm{span}}\)
( \newcommand{\kernel}{\mathrm{null}\,}\) \( \newcommand{\range}{\mathrm{range}\,}\)
\( \newcommand{\RealPart}{\mathrm{Re}}\) \( \newcommand{\ImaginaryPart}{\mathrm{Im}}\)
\( \newcommand{\Argument}{\mathrm{Arg}}\) \( \newcommand{\norm}[1]{\| #1 \|}\)
\( \newcommand{\inner}[2]{\langle #1, #2 \rangle}\)
\( \newcommand{\Span}{\mathrm{span}}\)
\( \newcommand{\id}{\mathrm{id}}\)
\( \newcommand{\Span}{\mathrm{span}}\)
\( \newcommand{\kernel}{\mathrm{null}\,}\)
\( \newcommand{\range}{\mathrm{range}\,}\)
\( \newcommand{\RealPart}{\mathrm{Re}}\)
\( \newcommand{\ImaginaryPart}{\mathrm{Im}}\)
\( \newcommand{\Argument}{\mathrm{Arg}}\)
\( \newcommand{\norm}[1]{\| #1 \|}\)
\( \newcommand{\inner}[2]{\langle #1, #2 \rangle}\)
\( \newcommand{\Span}{\mathrm{span}}\) \( \newcommand{\AA}{\unicode[.8,0]{x212B}}\)
\( \newcommand{\vectorA}[1]{\vec{#1}} % arrow\)
\( \newcommand{\vectorAt}[1]{\vec{\text{#1}}} % arrow\)
\( \newcommand{\vectorB}[1]{\overset { \scriptstyle \rightharpoonup} {\mathbf{#1}} } \)
\( \newcommand{\vectorC}[1]{\textbf{#1}} \)
\( \newcommand{\vectorD}[1]{\overrightarrow{#1}} \)
\( \newcommand{\vectorDt}[1]{\overrightarrow{\text{#1}}} \)
\( \newcommand{\vectE}[1]{\overset{-\!-\!\rightharpoonup}{\vphantom{a}\smash{\mathbf {#1}}}} \)
\( \newcommand{\vecs}[1]{\overset { \scriptstyle \rightharpoonup} {\mathbf{#1}} } \)
\( \newcommand{\vecd}[1]{\overset{-\!-\!\rightharpoonup}{\vphantom{a}\smash {#1}}} \)
\(\newcommand{\avec}{\mathbf a}\) \(\newcommand{\bvec}{\mathbf b}\) \(\newcommand{\cvec}{\mathbf c}\) \(\newcommand{\dvec}{\mathbf d}\) \(\newcommand{\dtil}{\widetilde{\mathbf d}}\) \(\newcommand{\evec}{\mathbf e}\) \(\newcommand{\fvec}{\mathbf f}\) \(\newcommand{\nvec}{\mathbf n}\) \(\newcommand{\pvec}{\mathbf p}\) \(\newcommand{\qvec}{\mathbf q}\) \(\newcommand{\svec}{\mathbf s}\) \(\newcommand{\tvec}{\mathbf t}\) \(\newcommand{\uvec}{\mathbf u}\) \(\newcommand{\vvec}{\mathbf v}\) \(\newcommand{\wvec}{\mathbf w}\) \(\newcommand{\xvec}{\mathbf x}\) \(\newcommand{\yvec}{\mathbf y}\) \(\newcommand{\zvec}{\mathbf z}\) \(\newcommand{\rvec}{\mathbf r}\) \(\newcommand{\mvec}{\mathbf m}\) \(\newcommand{\zerovec}{\mathbf 0}\) \(\newcommand{\onevec}{\mathbf 1}\) \(\newcommand{\real}{\mathbb R}\) \(\newcommand{\twovec}[2]{\left[\begin{array}{r}#1 \\ #2 \end{array}\right]}\) \(\newcommand{\ctwovec}[2]{\left[\begin{array}{c}#1 \\ #2 \end{array}\right]}\) \(\newcommand{\threevec}[3]{\left[\begin{array}{r}#1 \\ #2 \\ #3 \end{array}\right]}\) \(\newcommand{\cthreevec}[3]{\left[\begin{array}{c}#1 \\ #2 \\ #3 \end{array}\right]}\) \(\newcommand{\fourvec}[4]{\left[\begin{array}{r}#1 \\ #2 \\ #3 \\ #4 \end{array}\right]}\) \(\newcommand{\cfourvec}[4]{\left[\begin{array}{c}#1 \\ #2 \\ #3 \\ #4 \end{array}\right]}\) \(\newcommand{\fivevec}[5]{\left[\begin{array}{r}#1 \\ #2 \\ #3 \\ #4 \\ #5 \\ \end{array}\right]}\) \(\newcommand{\cfivevec}[5]{\left[\begin{array}{c}#1 \\ #2 \\ #3 \\ #4 \\ #5 \\ \end{array}\right]}\) \(\newcommand{\mattwo}[4]{\left[\begin{array}{rr}#1 \amp #2 \\ #3 \amp #4 \\ \end{array}\right]}\) \(\newcommand{\laspan}[1]{\text{Span}\{#1\}}\) \(\newcommand{\bcal}{\cal B}\) \(\newcommand{\ccal}{\cal C}\) \(\newcommand{\scal}{\cal S}\) \(\newcommand{\wcal}{\cal W}\) \(\newcommand{\ecal}{\cal E}\) \(\newcommand{\coords}[2]{\left\{#1\right\}_{#2}}\) \(\newcommand{\gray}[1]{\color{gray}{#1}}\) \(\newcommand{\lgray}[1]{\color{lightgray}{#1}}\) \(\newcommand{\rank}{\operatorname{rank}}\) \(\newcommand{\row}{\text{Row}}\) \(\newcommand{\col}{\text{Col}}\) \(\renewcommand{\row}{\text{Row}}\) \(\newcommand{\nul}{\text{Nul}}\) \(\newcommand{\var}{\text{Var}}\) \(\newcommand{\corr}{\text{corr}}\) \(\newcommand{\len}[1]{\left|#1\right|}\) \(\newcommand{\bbar}{\overline{\bvec}}\) \(\newcommand{\bhat}{\widehat{\bvec}}\) \(\newcommand{\bperp}{\bvec^\perp}\) \(\newcommand{\xhat}{\widehat{\xvec}}\) \(\newcommand{\vhat}{\widehat{\vvec}}\) \(\newcommand{\uhat}{\widehat{\uvec}}\) \(\newcommand{\what}{\widehat{\wvec}}\) \(\newcommand{\Sighat}{\widehat{\Sigma}}\) \(\newcommand{\lt}{<}\) \(\newcommand{\gt}{>}\) \(\newcommand{\amp}{&}\) \(\definecolor{fillinmathshade}{gray}{0.9}\)Pipes
Installing, maintaining, and troubleshooting plumbing systems requires specific knowledge of industry standardized measurements, construction codes, and specialized components of plumbing systems. While locally adopted plumbing codes apply to these systems and components, manufacturer installation and use instructions should be followed. Many common plumbing parts and materials like pipes and fittings do not come with instructions and should be sized and installed to comply with locally adopted plumbing and building codes.
A pipe or fitting’s ability to hold pressure, survive hot or cold temperatures, and endure natural elements is limited by it’s chemical composition, wall strength, and integrity of the sealing method used to join individual components. Schedule is the term used in referring to “plastic” (PVC, ABS, CPVC) pipe’s wall thickness, with lower numbers representing thinner walled pipes. The most common sizes used in residential construction are Schedule 40 (thinner wall used in drain, waste and vent applications) and Schedule 80 (thicker wall used in pressurized water applications). Several material types are approved for use in piping system that serve different purposes in a complete plumbing system to include water supply, and waste, drain and vent (DWV). The following table indicates the type of plumbing system that various types of piping are generally allowed in residential and light commercial construction:
| Common Material Types | Supply | Waste | Drain | Vent |
|---|---|---|---|---|
| Copper | Yes | No | No | No |
| PEX | Yes | No | No | No |
| PVC | Yes* | Yes | Yes | Yes |
| CPVC | Yes** | No | No | No |
| ABS | No | Yes | Yes | Yes |
| Cast Iron | No | Yes | Yes | Yes |
| No-hub | No | Yes | Yes | Yes |
| Galvanized Pipe | Yes | No | No | No |
| Black Iron Pipe*** | No | No | No | No |
Fittings
Fitting are used to join and redirect pipes and components to form complete plumbing systems. Due to the variety of designs of plumbing system components, fittings also facilitate adaptations from one size diameter of pipe or fitting to another. While many styles of fittings are used in most all types of systems, plumbing codes only allow some fittings to be used in particular type of plumbing system (supply or DWV) and have strict requirements as to how they are to be incorporated into the system (ex: compression fittings and unions should never be used inside of walls).
Fitting Terminology
National Pipe Thread (NPT) |
American standard thread used in pluming and piping systems. It may also be referred to as MPT or MNPT for male external threads and FPT or FNPT for female internal threads. A thread sealant of some type should always be used to obtain a leak free seal (except for NPTF). |
|---|---|
Iron Pipe Size (IPS) |
Older pipe sizing system still in use by some industries, including PVC pipe manufacturers. |
Slip fittings |
Slip fittings require a male component with a particular outside diameter to be joined with a female component with a similarly sized inside diameter either by solvent, glue, or, when using copper components, soldering. |
Couplings |
Couplings are designed to join two pipes of equal diameter. Couplings can be slip-to-slip or female thread to female thread. |
Bushings |
This fitting allows a pipe or fitting to be reduced to a smaller size and are made to be inserted into a pipe, inside slip, or female thread. Bushings outside diameter can be male thread or male slip with the inside diameter, being of the same style (slip or thread) as the outside, dictating the size the piping system is reduced to. |
Adapters |
Similar to bushings, adapters are used to convert pipes and fittings from one size to another. Unlike bushings, adapters can allow for conversion from slip to thread applications an, in some cases, one piping material type to another. |
Elbows |
Elbows normally create a 90° or 45° change in direction of a piping system. 22-1/2° fittings are also available for some piping systems. Depending on the material, elbows come in female slip-to-female slip, female slip-to-female slip, slip-to-female thread, slip-to-male thread. PVC and Copper female slip-to-male slip elbows are referred to as street elbows and they are used for close turns and swivel to fit connections. |
Tees |
Tees connect pipes at 90 degree angles divide the flow of a single line into two or more. Tees can also be used to reduce the size of a branch feeding off of a main line. Tees are normally fitted with female threads in each direction. |
Plugs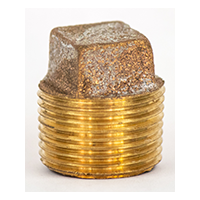 |
Plugs are male thread or male slip and designed to seal off unused plumbing system branches or unused component outlets. |
Caps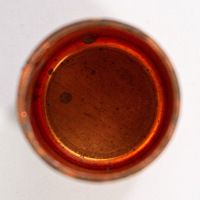 |
Caps, like plugs, are designed to seal off unused plumbing system branches or unused component outlets, but have female slip fittings or threads. |
Unions |
Unions facilitate the removal and repair of system components and consist of one fitting having a swivel nut which attaches to the other fitting which has a male threaded adapter with a flange or compression type sea |
National Pipe Thread (NPT) |
American standard thread used in pluming and piping systems. It may also be referred to as MPT or MNPT for male external threads and FPT or FNPT for female internal threads. A thread sealant of some type should always be used to obtain a leak free seal (except for NPTF). |
Compression fittings |
Compression fittings are sometimes used to install plumbing system components and make quick repairs on smooth outside diameter pipes like PVC and copper. Compression fittings require that a soft brass metal sleeve in copper applications, and Teflon or pliable washer in PVC applications, is compressed around the piping material by an adjustment nut to seal the fitting. |
Wyes |
Wyes are Y-shaped fittings that allow one pipe to be joined to another at a 45 degree angle. Wyes are not used in water supply systems, but are common in DWV systems where hard turns slow the flow of waste. |
Tee-Wyes |
Tee-Wyes are similar to standard wyes but provide an additional 45 degree branch. |
Sanitary Tees |
Sanitary Tees should be used when connecting a horizontal run, such as a waste arm to a vent stack or vertical riser. They are only used to go from the horizontal to vertical plane. |
Clean-Outs |
Clean-Outs are threaded plugged access points in a DWV system used for clearing clogged lines with augers and inspecting DWV systems with cameras. Plumbing system codes dictate how many clean-outs should be in a waste system by the length of run and the amount of turns in the system. |
Fittings by Clifford Rutherford, Rosemary Rutherford & Gwen Arkin is licensed under CC BY 4.0
| Fitting | Supply | Waste | Drain | Vent |
|---|---|---|---|---|
| Coupler | Yes | Yes | Yes | Yes |
| 90 degree elbow or offset | Yes | No | Yes | Yes |
| 90 degree sweep | No | Yes | Yes | Yes |
| 45 degree elbow or offset | Yes | No | Yes | Yes |
| 45 degree sweep | No | Yes | Yes | Yes |
| Tee | Yes | No | No | Yes |
| Tee-Wye | No | Yes | Yes | Yes |
| Sanitary Tee | No | Yes | Yes | Yes |
| Adapter | Yes | Yes | Yes | Yes |
| Bushing | Yes | Yes | Yes | Yes |
| No-hub | No | Yes | Yes | Yes |
| Nominal Pipe Size | Outside Diameter | Wall Thick. (Sch 40) | Wt. Per Ft. (Sch 40) | Wall Thick. (Sch 80) | Wt. Per Ft. (Sch 80) |
|---|---|---|---|---|---|
| 1/8 | 0.405 | 0.068 | 0.245 | 0.095 | 0.315 |
| 1/4 | 0.540 | 0.088 | 0.425 | 0.119 | 0.535 |
| 3/8 | 0.675 | 0.091 | 0.568 | 0.126 | 0.739 |
| 1/2 | 0.840 | 0.109 | 0.851 | 0.147 | 1.088 |
| 3/4 | 1.050 | 0.113 | 1.131 | 0.154 | 1.474 |
| 1 | 1.315 | 0.133 | 1.679 | 0.179 | 2.172 |
| 1-1/4 | 1.660 | 0.140 | 2.273 | 0.191 | 2.997 |
| 1-1/2 | 1.900 | 0.145 | 2.718 | 0.200 | 3.631 |
| 2 | 2.375 | 0.154 | 3.653 | 0.218 | 5.022 |
| 2-1/2 | 2.875 | 0.203 | 5.793 | 0.275 | 7.661 |
| 3 | 3.500 | 0.216 | 7.576 | 0.300 | 10.250 |
| 3-1/2 | 4.000 | 0.226 | 9.109 | 0.318 | 12.510 |
| 4 | 4.500 | 0.237 | 10.790 | 0.337 | 14.980 |
| 5 | 5.563 | 0.258 | 14.620 | 0.375 | 20.780 |
| 6 | 6.625 | 0.280 | 18.970 | 0.432 | 28.570 |
| 8 | 8.625 | 0.322 | 28.550 | 0.500 | 43.390 |
| 10 | 10.750 | 0.365 | 40.480 | 0.500 | 54.740 |
| 12 | 12.750 | 0.375 | 49.560 | 0.500 | 65.420 |
Solvent Cleaners, Primers, & Cements or Glues
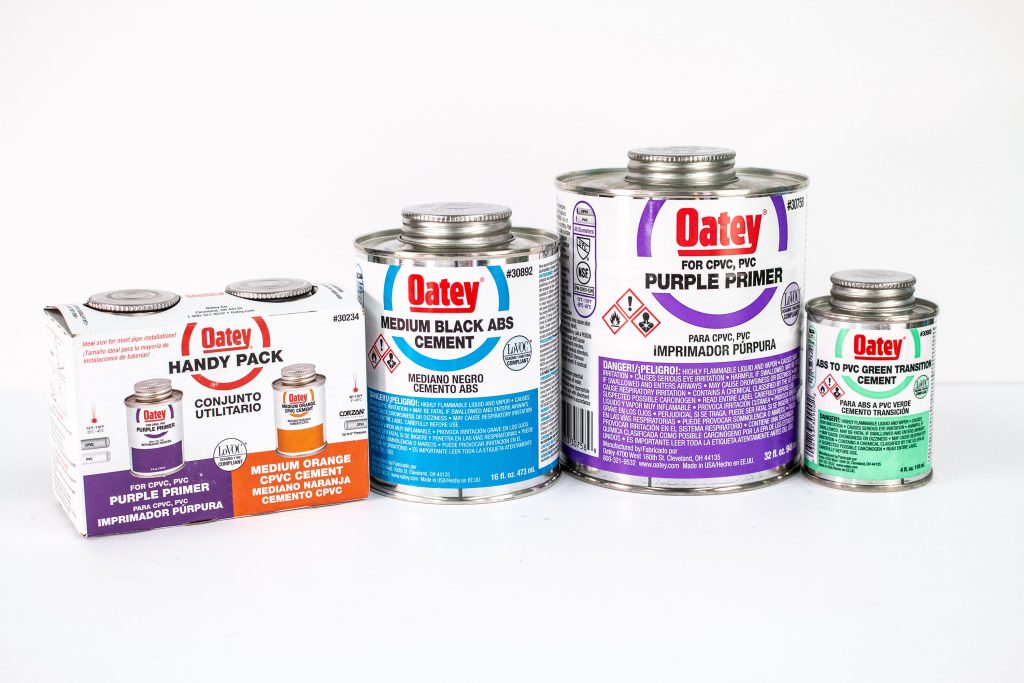
Pipe Glues & Primers by Gwen Arkin is licensed under CC BY 4.0
The use of cleaners, primers, and glues is specific to slip fitting applications and the chemical composition of the “plastic” piping being used. Chemical resistant gloves should be worn when using these chemical process adhesives as prolonged skin contact can result in irritation or chemical burn. Latex and vinyl gloves are not chemically resistant when used with some solvents, primers, and glues.
Always consult manufacture directions for set times of cements and glues before pressurizing any glued plumbing assembly. When assembling fittings and pipes, cleaners, primers and glues should be swabbed over the entire joint surface of both the male and female slip fitting. Although manufacturer directions may vary, in most cases a cleaner should be used, followed by a primer and then the solvent cement. Additionally, after application of the primer, the solvent cement should be applied immediately before the primer dries. Before the glue begins to set up, the male pipe or fitting is inserted fully into the female socket with a slight twisting motion. It is important to hold the joint firmly together until an initial setting of the glue is achieved, as glued fittings have a tendency to push apart as the chemical heats and expands.
Color and Material
Most manufacturers of these chemically reactive products have adopted colors in their products that identify the composition of material it is to be used with.
[table id=11 /]
|
Primers and Cleaners (Clear to Purple) |
Formulated to remove contaminates and chemically etch plastic piping. While some cleaners are clear, purple tinted primer stains white PVC enabling the user to ensure that all surfaces requiring glue are properly cleaned and etched. | |
| ABS Cement (Black) |  |
For ABS piping systems only. Note that primers should NOT be used for ABS pipe and that cleaner should be used in its place. |
| Wet-or Dry (Rain-or-Shine™) Cement (Blue) |  |
For PVC in damp applications. However, care should be used to keep fittings as dry as possible as these types of glues do not always set well if assembly is submerged. |
| CPVC Cement (Orange) |  |
Specially formulated to only be used with CPVC products. CPVC piping and fittings should only be joined to other types of products with threaded fittings. |
| Transition Cement (Green) |  |
Used to join ABS to PVC. Although not a common practice, some special circumstance and repair applications may require these two materials to be joined. |
| All Purpose Cement (Clear) |  |
Used with PVC, ABS, and CPVC, but should never be used to join two of the different types together. |
Color Blocks by Jonathan Kevan is licensed under CC BY 4.0
Difference Between PVC Cement Types & Primer
Query \(\PageIndex{1}\)
Differences Between CPVC, DWV PVC, Schedule 40 PVC, and Schedule 80 PVC
Query \(\PageIndex{2}\)
Threaded Pipe Fitting Assembly
Most pipe threads by themselves are not sufficient to create a complete seal in pressurized piping systems.
Thread Tape
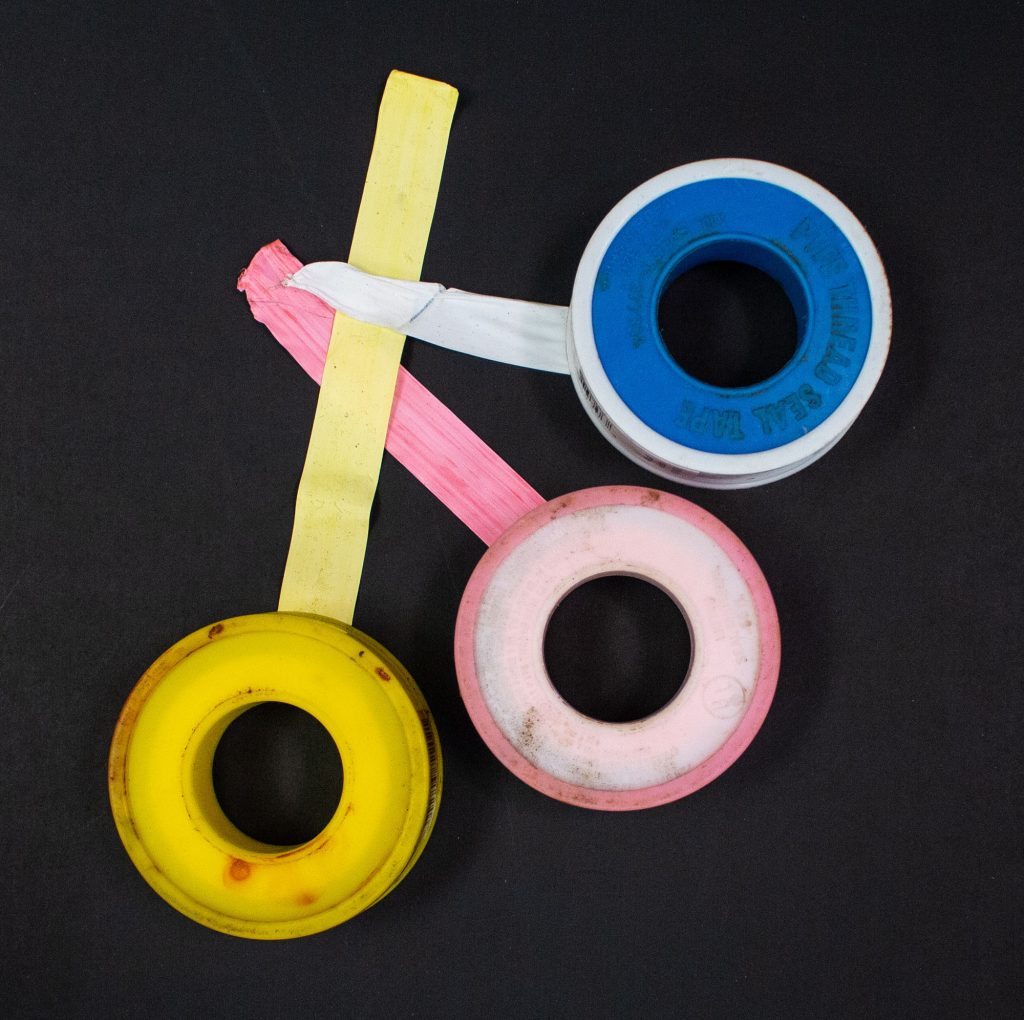
Teflon Tapes by Gwen Arkin is licensed under CC BY 4.0
IPS and NPT pipe threads require Polytetrafluoroethylene (PTFE) tape (Teflon™ by Chemours) to be applied to the male threads of fittings in order to obtain a complete seal. PTFE tape is available in widths of 1/2″, 3/4″ and 1″ and different weights or thicknesses (white-standard duty, pink-high density). The standard duty tape should be wrapped completely and evenly across the male threads approximately three to four times in the direction the threads turn to tighten the fitting. The easiest way to accomplish this is to place the tape roll in the left hand with the tape feeding toward the right from the bottom. While holding the male fitting with the right hand, place the end of the tape across the top of the fitting and turn the fitting clockwise. After securing the first 1 to 1-1/2 wraps, gently stretch the tape, continuing to turn while overlapping layers up and down the threads until 3 to four complete wraps are achieved evenly across the length of the male threads. Pull the tape firmly to break and thread male fitting into female fitting, securing with an appropriate wrench.
Standard or high density PTFE thread pipe cannot, by codes, be used for natural gas and propane applications. A chemically resistant yellow version is used for these flammable gas systems.
Pipe Dope
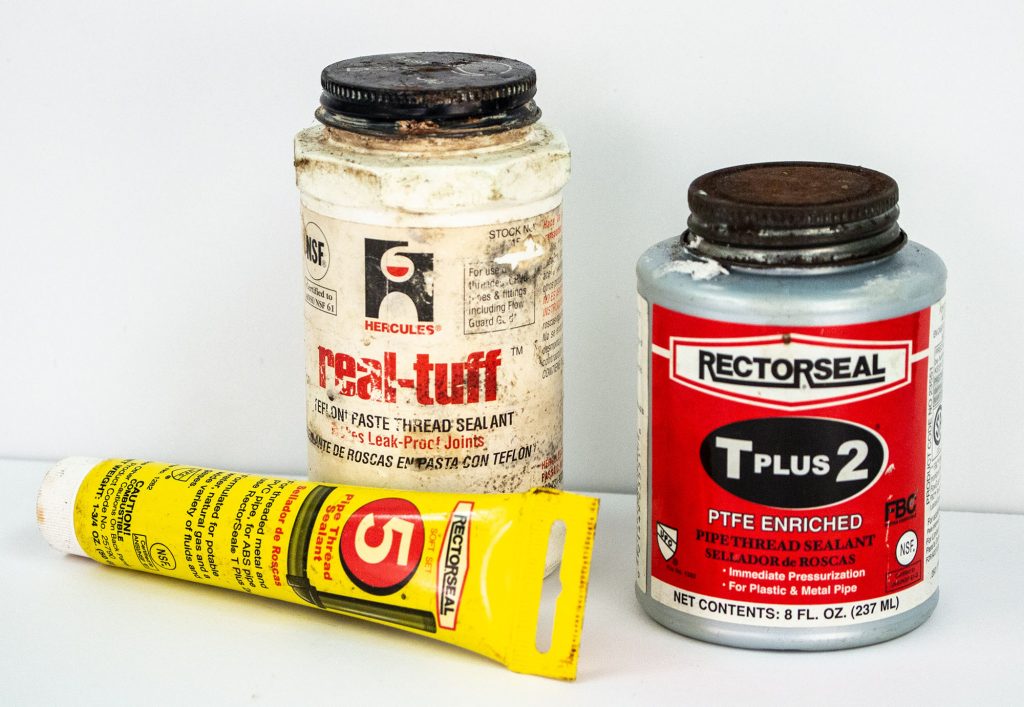
Pipe Dope by Gwen Arkin is licensed under CC BY 4.0
As with thread tape, pipe dope comes in PTFE and other compositions designed for water lines and for gas lines. While some people use pipe dope on top of thread tape but many manufactures claim that the is minimal or no benefit to using both products simultaneously. Some pipe dopes cannot be used on plastic piping, be sure to check manufacturer directions prior to use. Pipe dope is applied with a brush to the male threads of a piping joint and then the pipe is tightened into the female fitting and secured with an appropriate wrench.
Copper Pipe Fitting and Soldering
Due to the ever rising cost of copper material, soldering of copper pipes and fittings in residential construction is rapidly becoming obsolete as PEX flexible water supply tubing and similar solderless products, that use crimping system technologies, are being recognized and approved for installation by industry codes. However, plumbers and building maintenance technicians should always be prepared to use soldering techniques to install and repair copper supply lines of all sizes in commercial and older residential systems.
Simple Steps for Soldering
- Clean the pipe well.
- Clean the fitting well.
- Apply an even coat of flux.
- Don’t get the fitting too hot.
How to Solder Pipe
Query \(\PageIndex{3}\)


