
9.3: Common Office Interface
- Page ID
- 13624

\( \newcommand{\vecs}[1]{\overset { \scriptstyle \rightharpoonup} {\mathbf{#1}} } \)
\( \newcommand{\vecd}[1]{\overset{-\!-\!\rightharpoonup}{\vphantom{a}\smash {#1}}} \)
\( \newcommand{\dsum}{\displaystyle\sum\limits} \)
\( \newcommand{\dint}{\displaystyle\int\limits} \)
\( \newcommand{\dlim}{\displaystyle\lim\limits} \)
\( \newcommand{\id}{\mathrm{id}}\) \( \newcommand{\Span}{\mathrm{span}}\)
( \newcommand{\kernel}{\mathrm{null}\,}\) \( \newcommand{\range}{\mathrm{range}\,}\)
\( \newcommand{\RealPart}{\mathrm{Re}}\) \( \newcommand{\ImaginaryPart}{\mathrm{Im}}\)
\( \newcommand{\Argument}{\mathrm{Arg}}\) \( \newcommand{\norm}[1]{\| #1 \|}\)
\( \newcommand{\inner}[2]{\langle #1, #2 \rangle}\)
\( \newcommand{\Span}{\mathrm{span}}\)
\( \newcommand{\id}{\mathrm{id}}\)
\( \newcommand{\Span}{\mathrm{span}}\)
\( \newcommand{\kernel}{\mathrm{null}\,}\)
\( \newcommand{\range}{\mathrm{range}\,}\)
\( \newcommand{\RealPart}{\mathrm{Re}}\)
\( \newcommand{\ImaginaryPart}{\mathrm{Im}}\)
\( \newcommand{\Argument}{\mathrm{Arg}}\)
\( \newcommand{\norm}[1]{\| #1 \|}\)
\( \newcommand{\inner}[2]{\langle #1, #2 \rangle}\)
\( \newcommand{\Span}{\mathrm{span}}\) \( \newcommand{\AA}{\unicode[.8,0]{x212B}}\)
\( \newcommand{\vectorA}[1]{\vec{#1}} % arrow\)
\( \newcommand{\vectorAt}[1]{\vec{\text{#1}}} % arrow\)
\( \newcommand{\vectorB}[1]{\overset { \scriptstyle \rightharpoonup} {\mathbf{#1}} } \)
\( \newcommand{\vectorC}[1]{\textbf{#1}} \)
\( \newcommand{\vectorD}[1]{\overrightarrow{#1}} \)
\( \newcommand{\vectorDt}[1]{\overrightarrow{\text{#1}}} \)
\( \newcommand{\vectE}[1]{\overset{-\!-\!\rightharpoonup}{\vphantom{a}\smash{\mathbf {#1}}}} \)
\( \newcommand{\vecs}[1]{\overset { \scriptstyle \rightharpoonup} {\mathbf{#1}} } \)
\(\newcommand{\longvect}{\overrightarrow}\)
\( \newcommand{\vecd}[1]{\overset{-\!-\!\rightharpoonup}{\vphantom{a}\smash {#1}}} \)
\(\newcommand{\avec}{\mathbf a}\) \(\newcommand{\bvec}{\mathbf b}\) \(\newcommand{\cvec}{\mathbf c}\) \(\newcommand{\dvec}{\mathbf d}\) \(\newcommand{\dtil}{\widetilde{\mathbf d}}\) \(\newcommand{\evec}{\mathbf e}\) \(\newcommand{\fvec}{\mathbf f}\) \(\newcommand{\nvec}{\mathbf n}\) \(\newcommand{\pvec}{\mathbf p}\) \(\newcommand{\qvec}{\mathbf q}\) \(\newcommand{\svec}{\mathbf s}\) \(\newcommand{\tvec}{\mathbf t}\) \(\newcommand{\uvec}{\mathbf u}\) \(\newcommand{\vvec}{\mathbf v}\) \(\newcommand{\wvec}{\mathbf w}\) \(\newcommand{\xvec}{\mathbf x}\) \(\newcommand{\yvec}{\mathbf y}\) \(\newcommand{\zvec}{\mathbf z}\) \(\newcommand{\rvec}{\mathbf r}\) \(\newcommand{\mvec}{\mathbf m}\) \(\newcommand{\zerovec}{\mathbf 0}\) \(\newcommand{\onevec}{\mathbf 1}\) \(\newcommand{\real}{\mathbb R}\) \(\newcommand{\twovec}[2]{\left[\begin{array}{r}#1 \\ #2 \end{array}\right]}\) \(\newcommand{\ctwovec}[2]{\left[\begin{array}{c}#1 \\ #2 \end{array}\right]}\) \(\newcommand{\threevec}[3]{\left[\begin{array}{r}#1 \\ #2 \\ #3 \end{array}\right]}\) \(\newcommand{\cthreevec}[3]{\left[\begin{array}{c}#1 \\ #2 \\ #3 \end{array}\right]}\) \(\newcommand{\fourvec}[4]{\left[\begin{array}{r}#1 \\ #2 \\ #3 \\ #4 \end{array}\right]}\) \(\newcommand{\cfourvec}[4]{\left[\begin{array}{c}#1 \\ #2 \\ #3 \\ #4 \end{array}\right]}\) \(\newcommand{\fivevec}[5]{\left[\begin{array}{r}#1 \\ #2 \\ #3 \\ #4 \\ #5 \\ \end{array}\right]}\) \(\newcommand{\cfivevec}[5]{\left[\begin{array}{c}#1 \\ #2 \\ #3 \\ #4 \\ #5 \\ \end{array}\right]}\) \(\newcommand{\mattwo}[4]{\left[\begin{array}{rr}#1 \amp #2 \\ #3 \amp #4 \\ \end{array}\right]}\) \(\newcommand{\laspan}[1]{\text{Span}\{#1\}}\) \(\newcommand{\bcal}{\cal B}\) \(\newcommand{\ccal}{\cal C}\) \(\newcommand{\scal}{\cal S}\) \(\newcommand{\wcal}{\cal W}\) \(\newcommand{\ecal}{\cal E}\) \(\newcommand{\coords}[2]{\left\{#1\right\}_{#2}}\) \(\newcommand{\gray}[1]{\color{gray}{#1}}\) \(\newcommand{\lgray}[1]{\color{lightgray}{#1}}\) \(\newcommand{\rank}{\operatorname{rank}}\) \(\newcommand{\row}{\text{Row}}\) \(\newcommand{\col}{\text{Col}}\) \(\renewcommand{\row}{\text{Row}}\) \(\newcommand{\nul}{\text{Nul}}\) \(\newcommand{\var}{\text{Var}}\) \(\newcommand{\corr}{\text{corr}}\) \(\newcommand{\len}[1]{\left|#1\right|}\) \(\newcommand{\bbar}{\overline{\bvec}}\) \(\newcommand{\bhat}{\widehat{\bvec}}\) \(\newcommand{\bperp}{\bvec^\perp}\) \(\newcommand{\xhat}{\widehat{\xvec}}\) \(\newcommand{\vhat}{\widehat{\vvec}}\) \(\newcommand{\uhat}{\widehat{\uvec}}\) \(\newcommand{\what}{\widehat{\wvec}}\) \(\newcommand{\Sighat}{\widehat{\Sigma}}\) \(\newcommand{\lt}{<}\) \(\newcommand{\gt}{>}\) \(\newcommand{\amp}{&}\) \(\definecolor{fillinmathshade}{gray}{0.9}\)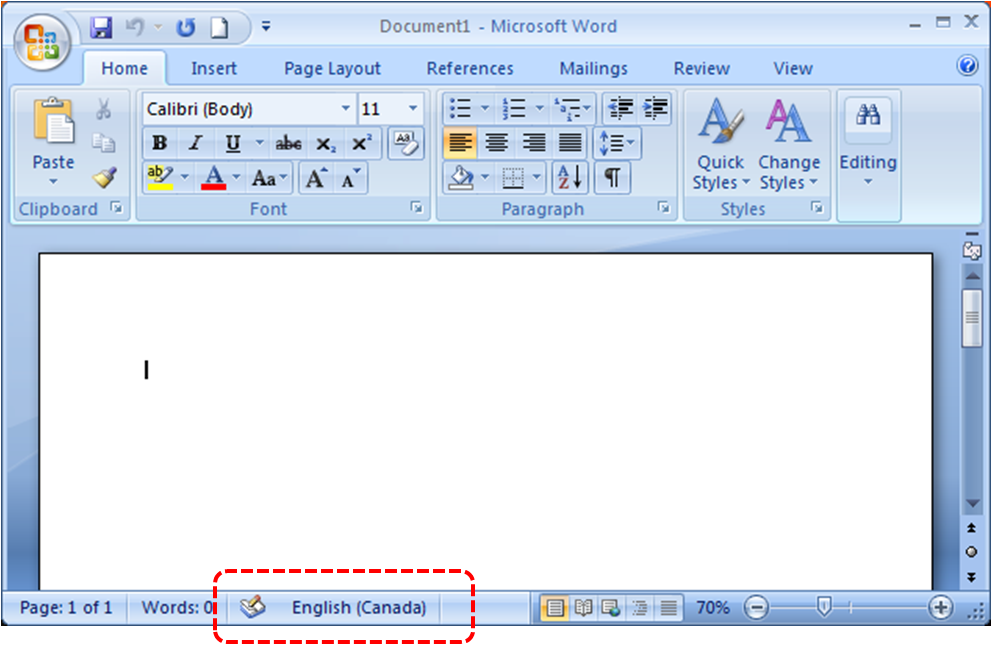
Each Office document contains common interface elements to help the user navigate the Application.
Quick Access Toolbar
The Quick Access Tool Bar is in the upper left-hand corner of the screen. By default, save, undo, and redo are on the toolbar. More options can be obtained by selecting the downward arrow  to access other commands.
Office Ribbon
Like the Windows 10 Ribbon, the Office Ribbon Contains controls and menus that allow the user to manipulate the document they are working with. Each Office Application contains the ribbon, but the specific features of the Ribbon vary by application. Each office app contains the Home tab. The Ribbon can be customized using the  command, located in the top right corner of the window.
Title Bar
The Office Title Bar lists the name of the file and the Office Application that is being used. To establish a title for the file you are working on, save the file and create a specific name for the file. After saving, the file name will show on the Title Bar.
Window Controls
Like Windows 10, Office Window Controls allow the user to minimize, maximize, and close the specific program. Minimizing a window removes the window from view. It can be returned to its current view by selecting the running application in the taskbar. Maximizing a Window makes it Fullscreen. The resize feature returns it to an open running window. Closing a window removes the program from active memory.
Vertical Scroll Bar
Office documents can often be multiple pages or have information that cannot be displayed on one screen. The Vertical Scroll Bar allows the user to scroll-move up or move down throughout the document.
Zoom Tools
Zoom Tools are in the lower right-hand corner of the screen. They allow the user to zoom in or magnify or zoom out to see a bigger picture of their document. Document zooming can be completed by the slider, or via the “+” or “- “buttons on the document. The zoom percentage is also displayed.
Document information
Document information relevant to the Office Application is displayed in the lower-left and corner. In Microsoft Word, this information usually contains the number of changes and words. Excel displays mathematical results, and PowerPoint displays slide numbers.
Rulers
All office documents can display vertical and horizontal rulers. These rulers can be hidden if a view setting is enabled. Rulers allow the user to see with fine precision their actual location in the document.
Cursor
Like Windows, Office uses a cursor that looks like an arrow to select commands. Areas, where text can be entered, is shown with a straight cursor instead of an arrow. The straight line is known as the text insertion point.
Work Area
Finally, the most important part- in the center of each Office Application is the work area, where the actual work and input is completed. This work area varies in appearance depending on the Office Application.
Creating & Saving File in Word
In addition to common user interface elements, all Office Documents allow the user to open existing files, save files, and create new files in the File Tab. In addition to manual saves, Office has an autosave/recovery function that can automatically save your work in the event of a computer malfunction or “crash” To save a file in Microsoft Office, complete the following actions
- Click the File tab on the Ribbon in the Upper left-hand corner.
- A new screen (Backstage view) launches. On the left-hand side of the screen, choose “Save” or “Save As”. If the document has been previously saved, you won't have to select a save destination (e.g., desktop) or a file name--the existing file will simply be updated. Under "Save As", decide on your save location. Typical locations include "This PC" and OneDrive, but you can also click "Browse" to select a specific location.
- Double-click your save location. This will take you to the file name screen.
- In the file name screen, enter your desired file name.
- Click “Save” to save your file.
- Verify that your file was saved before closing the document. Office Applications will prompt you to save your file if it was not saved before closing as well.
Viewing & Printing your work
Microsoft Office Applications all present common user interfaces to change the view of an application and print an application. While each office application has specific views, there are three common views in each Microsoft Office Product.
Read Mode
Read mode is the default view when a document is set to read-only-this means that the viewer cannot edit the file. Read mode is also a helpful mode if the user wants to read the file in full screen without other interface elements of the office on screen.
Print Layout Mode
Print layout mode allows the user to view the document is it would be displayed printed out on an 8 1/2X11 standard printer paper. It allows the most realistic view of the document’s appearance if printed.
Web Layout Mode
Web Layout mode displays the document to read like it would read if it was on a website. This is helpful if the destination of the document is on the internet to be accessed with a web browser. If the document is being created to display online, the user will want to make sure the layout will be compatible with this format.