
13.7: Review Tab
- Page ID
- 13666

\( \newcommand{\vecs}[1]{\overset { \scriptstyle \rightharpoonup} {\mathbf{#1}} } \)
\( \newcommand{\vecd}[1]{\overset{-\!-\!\rightharpoonup}{\vphantom{a}\smash {#1}}} \)
\( \newcommand{\id}{\mathrm{id}}\) \( \newcommand{\Span}{\mathrm{span}}\)
( \newcommand{\kernel}{\mathrm{null}\,}\) \( \newcommand{\range}{\mathrm{range}\,}\)
\( \newcommand{\RealPart}{\mathrm{Re}}\) \( \newcommand{\ImaginaryPart}{\mathrm{Im}}\)
\( \newcommand{\Argument}{\mathrm{Arg}}\) \( \newcommand{\norm}[1]{\| #1 \|}\)
\( \newcommand{\inner}[2]{\langle #1, #2 \rangle}\)
\( \newcommand{\Span}{\mathrm{span}}\)
\( \newcommand{\id}{\mathrm{id}}\)
\( \newcommand{\Span}{\mathrm{span}}\)
\( \newcommand{\kernel}{\mathrm{null}\,}\)
\( \newcommand{\range}{\mathrm{range}\,}\)
\( \newcommand{\RealPart}{\mathrm{Re}}\)
\( \newcommand{\ImaginaryPart}{\mathrm{Im}}\)
\( \newcommand{\Argument}{\mathrm{Arg}}\)
\( \newcommand{\norm}[1]{\| #1 \|}\)
\( \newcommand{\inner}[2]{\langle #1, #2 \rangle}\)
\( \newcommand{\Span}{\mathrm{span}}\) \( \newcommand{\AA}{\unicode[.8,0]{x212B}}\)
\( \newcommand{\vectorA}[1]{\vec{#1}} % arrow\)
\( \newcommand{\vectorAt}[1]{\vec{\text{#1}}} % arrow\)
\( \newcommand{\vectorB}[1]{\overset { \scriptstyle \rightharpoonup} {\mathbf{#1}} } \)
\( \newcommand{\vectorC}[1]{\textbf{#1}} \)
\( \newcommand{\vectorD}[1]{\overrightarrow{#1}} \)
\( \newcommand{\vectorDt}[1]{\overrightarrow{\text{#1}}} \)
\( \newcommand{\vectE}[1]{\overset{-\!-\!\rightharpoonup}{\vphantom{a}\smash{\mathbf {#1}}}} \)
\( \newcommand{\vecs}[1]{\overset { \scriptstyle \rightharpoonup} {\mathbf{#1}} } \)
\( \newcommand{\vecd}[1]{\overset{-\!-\!\rightharpoonup}{\vphantom{a}\smash {#1}}} \)
\(\newcommand{\avec}{\mathbf a}\) \(\newcommand{\bvec}{\mathbf b}\) \(\newcommand{\cvec}{\mathbf c}\) \(\newcommand{\dvec}{\mathbf d}\) \(\newcommand{\dtil}{\widetilde{\mathbf d}}\) \(\newcommand{\evec}{\mathbf e}\) \(\newcommand{\fvec}{\mathbf f}\) \(\newcommand{\nvec}{\mathbf n}\) \(\newcommand{\pvec}{\mathbf p}\) \(\newcommand{\qvec}{\mathbf q}\) \(\newcommand{\svec}{\mathbf s}\) \(\newcommand{\tvec}{\mathbf t}\) \(\newcommand{\uvec}{\mathbf u}\) \(\newcommand{\vvec}{\mathbf v}\) \(\newcommand{\wvec}{\mathbf w}\) \(\newcommand{\xvec}{\mathbf x}\) \(\newcommand{\yvec}{\mathbf y}\) \(\newcommand{\zvec}{\mathbf z}\) \(\newcommand{\rvec}{\mathbf r}\) \(\newcommand{\mvec}{\mathbf m}\) \(\newcommand{\zerovec}{\mathbf 0}\) \(\newcommand{\onevec}{\mathbf 1}\) \(\newcommand{\real}{\mathbb R}\) \(\newcommand{\twovec}[2]{\left[\begin{array}{r}#1 \\ #2 \end{array}\right]}\) \(\newcommand{\ctwovec}[2]{\left[\begin{array}{c}#1 \\ #2 \end{array}\right]}\) \(\newcommand{\threevec}[3]{\left[\begin{array}{r}#1 \\ #2 \\ #3 \end{array}\right]}\) \(\newcommand{\cthreevec}[3]{\left[\begin{array}{c}#1 \\ #2 \\ #3 \end{array}\right]}\) \(\newcommand{\fourvec}[4]{\left[\begin{array}{r}#1 \\ #2 \\ #3 \\ #4 \end{array}\right]}\) \(\newcommand{\cfourvec}[4]{\left[\begin{array}{c}#1 \\ #2 \\ #3 \\ #4 \end{array}\right]}\) \(\newcommand{\fivevec}[5]{\left[\begin{array}{r}#1 \\ #2 \\ #3 \\ #4 \\ #5 \\ \end{array}\right]}\) \(\newcommand{\cfivevec}[5]{\left[\begin{array}{c}#1 \\ #2 \\ #3 \\ #4 \\ #5 \\ \end{array}\right]}\) \(\newcommand{\mattwo}[4]{\left[\begin{array}{rr}#1 \amp #2 \\ #3 \amp #4 \\ \end{array}\right]}\) \(\newcommand{\laspan}[1]{\text{Span}\{#1\}}\) \(\newcommand{\bcal}{\cal B}\) \(\newcommand{\ccal}{\cal C}\) \(\newcommand{\scal}{\cal S}\) \(\newcommand{\wcal}{\cal W}\) \(\newcommand{\ecal}{\cal E}\) \(\newcommand{\coords}[2]{\left\{#1\right\}_{#2}}\) \(\newcommand{\gray}[1]{\color{gray}{#1}}\) \(\newcommand{\lgray}[1]{\color{lightgray}{#1}}\) \(\newcommand{\rank}{\operatorname{rank}}\) \(\newcommand{\row}{\text{Row}}\) \(\newcommand{\col}{\text{Col}}\) \(\renewcommand{\row}{\text{Row}}\) \(\newcommand{\nul}{\text{Nul}}\) \(\newcommand{\var}{\text{Var}}\) \(\newcommand{\corr}{\text{corr}}\) \(\newcommand{\len}[1]{\left|#1\right|}\) \(\newcommand{\bbar}{\overline{\bvec}}\) \(\newcommand{\bhat}{\widehat{\bvec}}\) \(\newcommand{\bperp}{\bvec^\perp}\) \(\newcommand{\xhat}{\widehat{\xvec}}\) \(\newcommand{\vhat}{\widehat{\vvec}}\) \(\newcommand{\uhat}{\widehat{\uvec}}\) \(\newcommand{\what}{\widehat{\wvec}}\) \(\newcommand{\Sighat}{\widehat{\Sigma}}\) \(\newcommand{\lt}{<}\) \(\newcommand{\gt}{>}\) \(\newcommand{\amp}{&}\) \(\definecolor{fillinmathshade}{gray}{0.9}\)
The purpose of the Review Tab is for proofing your document and providing possibilities for seeking feedback on your final edits. The Review Tab is separated into multiple groups: Proofing, Speech, Accessibility, Language, Comments, Tracking, Changes, Compare, Ink, & Resume.
Proofing
The Proofing Group allows the user to improve the words in their document. Users can click on Spelling & Grammar to launch Word’s built-in spelling and grammar checker to fix words and phrases that may be incorrect. When selected, the icon launches a navigation pane on the right side of the document, allowing the user to review spelling and grammar errors that the textbook does not find accurate, and make the changes, or ignore the recommendations.
Speech & Accessibility
Microsoft Office can read any text in the document by clicking on the Read Aloud icon in the Speech Group. Once the Read Aloud button is selected, Word will begin reading at the insertion point of the text. The Check Accessibility button launches the Accessibility Checker tool in Microsoft Word on a right-side panel of the page. The Accessibility Checker will review the entire document to find areas that would impair screen readers and other accessibility programs to aid those who have difficulty seeing or reading a document to still be able to understand the text in the document.
Language
The Language group allows the user to translate words in the document into a different language. Users will have the opportunity to translate a highlighted section or an entire document into another language. There are a variety of languages available for translation. In addition, the Language icon provides the user with the option to change which language Microsoft Word will use for use in the Spelling & Grammar checker.
Comments
Want to place a note in your document to review at a later time, or are you working collaboratively with someone else on the document? Using the Comments group is the easiest way to keep track of information about the document without changing characters in the actual document itself. Comments are automatically “turned off” by default. They can be enabled by selecting the Show Comments icon. To enter a comment, highlight the text you wish to comment about or place your insertion point where you want the comment to be placed. Then, select New Comment. A new section of the Word Document will launch on the right-hand side of the page. This will not be able to be printed but will display to the user with a line connecting the comment to the insertion point of the comment.
Tracking & Changes
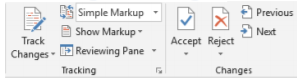
When you are working with multiple individuals on a document it can become difficult to keep track of which changes each user has made. The Tracking & Changes group can help the user determine which text additions or deletions were entered and which user made the changes. Be default, the Track Changes icon is not enabled. To turn on tracking, click on the Track Changes icon. The user can also select the type of changes made in the document selecting Show Markup. A change in the document is entered in Red with an underline. Once a change has been entered, the author has the option to accept or reject the change in the Changes group. Users can navigate through the changes by clicking on Previous and Next. Once the user has accepted or rejected the change, the text will revert back to the standard text and fonts in the document. Users can also approve or deny all changes in the section or entire document. Remember, you can always stop tracking changes by clicking on the Track Changes icon.
Compare, Protect, & Ink Groups
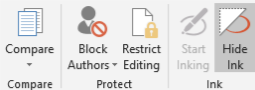
Finally, users can place the finishing touches on the document by using Compare & Protect groups. Compare allows the user to compare their current version with previous versions of the document. Microsoft Word stores each version of the document when it is saved. The user can review each version of the document with the current version. This allows the user to revert the document back to a previous version if a catastrophic change is made to the document. The Protect group allows the author to stop certain authors from being able to edit or restrict others from making any changes to a document to make it read-only or restrict permission to change words in the document.