
8.7: Inserting and Modifying Graphics
- Page ID
- 14345

\( \newcommand{\vecs}[1]{\overset { \scriptstyle \rightharpoonup} {\mathbf{#1}} } \)
\( \newcommand{\vecd}[1]{\overset{-\!-\!\rightharpoonup}{\vphantom{a}\smash {#1}}} \)
\( \newcommand{\dsum}{\displaystyle\sum\limits} \)
\( \newcommand{\dint}{\displaystyle\int\limits} \)
\( \newcommand{\dlim}{\displaystyle\lim\limits} \)
\( \newcommand{\id}{\mathrm{id}}\) \( \newcommand{\Span}{\mathrm{span}}\)
( \newcommand{\kernel}{\mathrm{null}\,}\) \( \newcommand{\range}{\mathrm{range}\,}\)
\( \newcommand{\RealPart}{\mathrm{Re}}\) \( \newcommand{\ImaginaryPart}{\mathrm{Im}}\)
\( \newcommand{\Argument}{\mathrm{Arg}}\) \( \newcommand{\norm}[1]{\| #1 \|}\)
\( \newcommand{\inner}[2]{\langle #1, #2 \rangle}\)
\( \newcommand{\Span}{\mathrm{span}}\)
\( \newcommand{\id}{\mathrm{id}}\)
\( \newcommand{\Span}{\mathrm{span}}\)
\( \newcommand{\kernel}{\mathrm{null}\,}\)
\( \newcommand{\range}{\mathrm{range}\,}\)
\( \newcommand{\RealPart}{\mathrm{Re}}\)
\( \newcommand{\ImaginaryPart}{\mathrm{Im}}\)
\( \newcommand{\Argument}{\mathrm{Arg}}\)
\( \newcommand{\norm}[1]{\| #1 \|}\)
\( \newcommand{\inner}[2]{\langle #1, #2 \rangle}\)
\( \newcommand{\Span}{\mathrm{span}}\) \( \newcommand{\AA}{\unicode[.8,0]{x212B}}\)
\( \newcommand{\vectorA}[1]{\vec{#1}} % arrow\)
\( \newcommand{\vectorAt}[1]{\vec{\text{#1}}} % arrow\)
\( \newcommand{\vectorB}[1]{\overset { \scriptstyle \rightharpoonup} {\mathbf{#1}} } \)
\( \newcommand{\vectorC}[1]{\textbf{#1}} \)
\( \newcommand{\vectorD}[1]{\overrightarrow{#1}} \)
\( \newcommand{\vectorDt}[1]{\overrightarrow{\text{#1}}} \)
\( \newcommand{\vectE}[1]{\overset{-\!-\!\rightharpoonup}{\vphantom{a}\smash{\mathbf {#1}}}} \)
\( \newcommand{\vecs}[1]{\overset { \scriptstyle \rightharpoonup} {\mathbf{#1}} } \)
\(\newcommand{\longvect}{\overrightarrow}\)
\( \newcommand{\vecd}[1]{\overset{-\!-\!\rightharpoonup}{\vphantom{a}\smash {#1}}} \)
\(\newcommand{\avec}{\mathbf a}\) \(\newcommand{\bvec}{\mathbf b}\) \(\newcommand{\cvec}{\mathbf c}\) \(\newcommand{\dvec}{\mathbf d}\) \(\newcommand{\dtil}{\widetilde{\mathbf d}}\) \(\newcommand{\evec}{\mathbf e}\) \(\newcommand{\fvec}{\mathbf f}\) \(\newcommand{\nvec}{\mathbf n}\) \(\newcommand{\pvec}{\mathbf p}\) \(\newcommand{\qvec}{\mathbf q}\) \(\newcommand{\svec}{\mathbf s}\) \(\newcommand{\tvec}{\mathbf t}\) \(\newcommand{\uvec}{\mathbf u}\) \(\newcommand{\vvec}{\mathbf v}\) \(\newcommand{\wvec}{\mathbf w}\) \(\newcommand{\xvec}{\mathbf x}\) \(\newcommand{\yvec}{\mathbf y}\) \(\newcommand{\zvec}{\mathbf z}\) \(\newcommand{\rvec}{\mathbf r}\) \(\newcommand{\mvec}{\mathbf m}\) \(\newcommand{\zerovec}{\mathbf 0}\) \(\newcommand{\onevec}{\mathbf 1}\) \(\newcommand{\real}{\mathbb R}\) \(\newcommand{\twovec}[2]{\left[\begin{array}{r}#1 \\ #2 \end{array}\right]}\) \(\newcommand{\ctwovec}[2]{\left[\begin{array}{c}#1 \\ #2 \end{array}\right]}\) \(\newcommand{\threevec}[3]{\left[\begin{array}{r}#1 \\ #2 \\ #3 \end{array}\right]}\) \(\newcommand{\cthreevec}[3]{\left[\begin{array}{c}#1 \\ #2 \\ #3 \end{array}\right]}\) \(\newcommand{\fourvec}[4]{\left[\begin{array}{r}#1 \\ #2 \\ #3 \\ #4 \end{array}\right]}\) \(\newcommand{\cfourvec}[4]{\left[\begin{array}{c}#1 \\ #2 \\ #3 \\ #4 \end{array}\right]}\) \(\newcommand{\fivevec}[5]{\left[\begin{array}{r}#1 \\ #2 \\ #3 \\ #4 \\ #5 \\ \end{array}\right]}\) \(\newcommand{\cfivevec}[5]{\left[\begin{array}{c}#1 \\ #2 \\ #3 \\ #4 \\ #5 \\ \end{array}\right]}\) \(\newcommand{\mattwo}[4]{\left[\begin{array}{rr}#1 \amp #2 \\ #3 \amp #4 \\ \end{array}\right]}\) \(\newcommand{\laspan}[1]{\text{Span}\{#1\}}\) \(\newcommand{\bcal}{\cal B}\) \(\newcommand{\ccal}{\cal C}\) \(\newcommand{\scal}{\cal S}\) \(\newcommand{\wcal}{\cal W}\) \(\newcommand{\ecal}{\cal E}\) \(\newcommand{\coords}[2]{\left\{#1\right\}_{#2}}\) \(\newcommand{\gray}[1]{\color{gray}{#1}}\) \(\newcommand{\lgray}[1]{\color{lightgray}{#1}}\) \(\newcommand{\rank}{\operatorname{rank}}\) \(\newcommand{\row}{\text{Row}}\) \(\newcommand{\col}{\text{Col}}\) \(\renewcommand{\row}{\text{Row}}\) \(\newcommand{\nul}{\text{Nul}}\) \(\newcommand{\var}{\text{Var}}\) \(\newcommand{\corr}{\text{corr}}\) \(\newcommand{\len}[1]{\left|#1\right|}\) \(\newcommand{\bbar}{\overline{\bvec}}\) \(\newcommand{\bhat}{\widehat{\bvec}}\) \(\newcommand{\bperp}{\bvec^\perp}\) \(\newcommand{\xhat}{\widehat{\xvec}}\) \(\newcommand{\vhat}{\widehat{\vvec}}\) \(\newcommand{\uhat}{\widehat{\uvec}}\) \(\newcommand{\what}{\widehat{\wvec}}\) \(\newcommand{\Sighat}{\widehat{\Sigma}}\) \(\newcommand{\lt}{<}\) \(\newcommand{\gt}{>}\) \(\newcommand{\amp}{&}\) \(\definecolor{fillinmathshade}{gray}{0.9}\)Graphics can be utilized to make a presentation more interesting and informative. If the PowerPoint developer is trying to keep the length of a presentation to ten or fewer slides, keep in mind that many believe that a picture is worth a thousand words! Sometimes graphics can be more informative than words and enhance a presentation by evoking emotion in the audience. PowerPoint graphics typically refer to pictures, and pictures can take the form of digital photographs, clip art, or computer-generated imagery (CGI). Digital photographs are realistic images captured with a digital camera or scanned to a file by a scanner. Clip art images are line-based drawings that are intentionally non-realistic. An example of computer-generated image is a logo, typically produced in a software program such as Adobe Illustrator, or a 3-D graphic, such as an avatar.
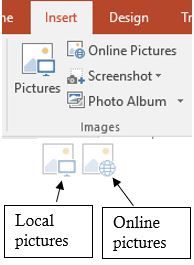
Inserting graphics into PowerPoint is very similar to Word. However, in addition to using the Images group options on the Insert tab, users can also insert a graphic via an icon in a content placeholder. Graphics can either be inserted from the user’s own device, or from online sources.
Each type of graphic has its pros and cons. Clip art can be popular because their simplicity results in a compact file size, which can be increased or decreased without distortion. Additionally, the unrealistic nature of these images makes them appropriate for representing sensitive topics that require anonymity. Digital photos are very realistic, which inspire authentic reactions. However, these images result in large files that can be difficult to transfer among devices. Additionally, resizing a digital photo can create undesirable pixilation.
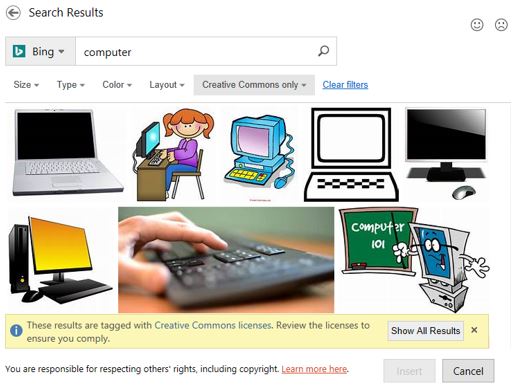
Caution should be used to ensure that graphics are used appropriately by only including images that are relevant to the message being advanced. Graphics usage should also obey applicable copyright laws, especially when downloading images from Internet sources. According the U.S. Copyright Office, a copyright is a form of protection for “original works of authorship”, and is usually identified by the © symbol. Photos and high-quality artwork that has been self-produced are not at odds to copyright infringement, but images downloaded from online sources should be credited, purchased or defined as royalty-free or be accessed through a Creative Commons (CC) license. By default, Microsoft’s Bing Image search engine will only return images licensed under Creative Commons when utilizing the Online Pictures command in PowerPoint.
The robust photo-editing functionality within PowerPoint makes it easy to manipulate the size, location, and look of inserted graphics. After selecting the graphic, sizing handles will appear around the graphic, and the Picture Tools contextual tab will appear to offer a plethora of image formatting features.

Some of the most commonly used picture formatting tools include:
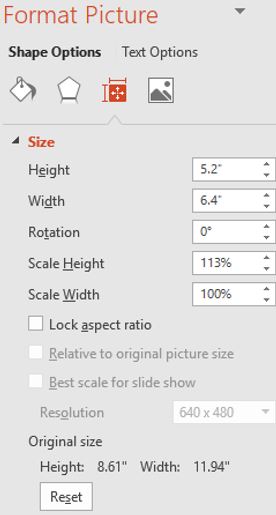
- Resizing and cropping. The easiest way to resize a graphic is to drag the sizing handles. The corner handles will increase or decrease the image’s size proportionally, whereas the middle or top/bottom handles can distort the image’s size. Specific height and width measurements can be defined in the Size group. Click the launcher to open the Format Picture pane. Clearing the Lock Aspect Ratio checkbox will allow the user to define specific sizes for the height or width without proportionally resizing the other dimension.Cropping an image results in a part of the image being removed. This is useful when an image has a lot of unwanted content that can distract from focusing on a certain aspect of an image. An image can even be cropped to fit into a specific shape. To reduce the file size of the presentation, use the Compress Pictures feature, in the Adjust group, to permanently delete the cropped portion of the image. Clicking Reset in the Format Picture pane or Reset Picture in the Adjust group will return the image to its original size.
- Corrections and Color adjustments. If an inserted picture is too dark, the Corrections feature allows the user to edit the picture’s brightness and contrast. The picture can be softened or sharpened as well to make the picture blurry or distinct. Color adjustments can also be applied to change the saturation (how vivid the colors are) and tone (the temperature – cool or warm) of a picture. Colored filters can also be overlaid to recolor a picture to fit the presentation’s theme.
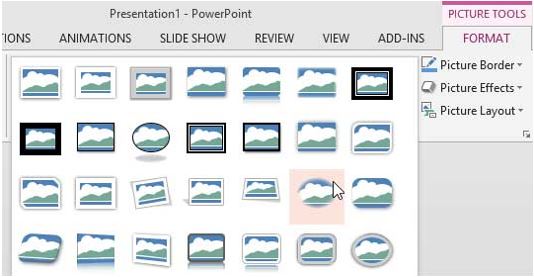
- Picture styles. Applying a picture style or effect from the numerous preset gallery options can visually enhance the way a picture appears. Picture styles make the picture look more stylish by applying a combination of borders, 3-D rotations, shadow effects or frame shapes. After selecting the picture, hover the cursor over any of the gallery choices, and PowerPoint will display a live preview of the style applied to the image. Clicking a selection will apply the picture style settings.
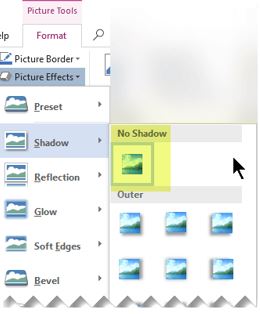
- Picture effects . Users can enhance a picture by adding effects, such as Shadows, Reflections, Glows, Soft Edges, Bevels or 3-D Rotations. To fine-tune the effect, click Options at the bottom of any effect menu. Multiple effects can be applied to the same picture, such as an outer shadow, an angle bevel and a contrasting right, perspective 3-D rotation.
Practice 5: The Solar System – Part 4
- Plan your presentation. Your goal is to create a slide show to accompany your presentation regarding the planet Earth. The content will include slides with text, a table and some photos of various continents. The design will be basic. The audience is your fellow classmates.
- Open the recently edited data file Continents.pptx from your data files.
- View the presentation in Slide Sorter view, and then revert back to Normal view.
- In the title slide, add your name to the subtitle placeholder.
- Insert a new Title and Content slide after the title slide (slide 1). Add the title: Earth’s Continents, and then add seven bullets to the Content placeholder with the text: North America, South America, Europe, Africa, Asia, Australia, Antarctica. Make the title font 54pt.
- In slide 3 (North America), add an online picture of North America to the content placeholder using the Online Pictures icon.
- In slide 4 (South America), change the size of the graphic to have a height of 4.5”. Let PowerPoint adjust the width proportionately.
- In slide 7 (Africa), apply a Brightness +20%, Contrast -20% correction adjustment.
- In slide 8 (Oceania/Australia), apply a Metal Oval picture style, and a Glow 18pt, blue picture effect, as well as a Perspective: Turned Left, Tilted Up 3-D Rotation picture effect.

- Add the following speaker not to the Oceania/Australia slide: Talk with an Aussie accent!
- Change the layout of the Oceania/Australia slide to a Title and Two Content layout. In the new content placeholder, add the following text bullets by referring to the illustration to the right:
- Save the presentation with the file name My Continents.pptx to your default local folder.